In this blog post I’ll describe some details of the installation process of a Rook-based Ceph cluster on the Kubernetes setup used by the Yaook project. I’ll attempt to use as little jargon as possible to make this post accessible to as many people as possible. Following the text through should be possible for anyone with „reasonable“ skills at linux command line, but, in case the reader has to do any additional troubleshooting, knowledge of the deployed technologies is probably required. I’ll assume conceptual familiarity with Ceph and Kubernetes (but hopefully not too much of the practical kind as I myself had that much of such when first doing this kind of setup). Let’s however start by quickly explaining the other two buzzwords thrown around in the first sentence: Rook and Yaook.
- Rook allows deploying storage solutions (such as Ceph) on Kubernetes. It uses operators for this.
- Yaook is short for yet-another-openstack-on-kubernetes ie. it is a project that offers Openstack running on Kubernetes. For the purpose of this blog post we are not too interested in the Openstack bit (so no need to bother yourself with it if you are unfamiliar), but the fact that the project has tooling that allows one to setup a Kubernetes cluster and Rook on top of it. I’ll shothand the Yaook kubernetes setup as yk8s for the rest of this post.
Why Bother with Ceph on Kubernetes?
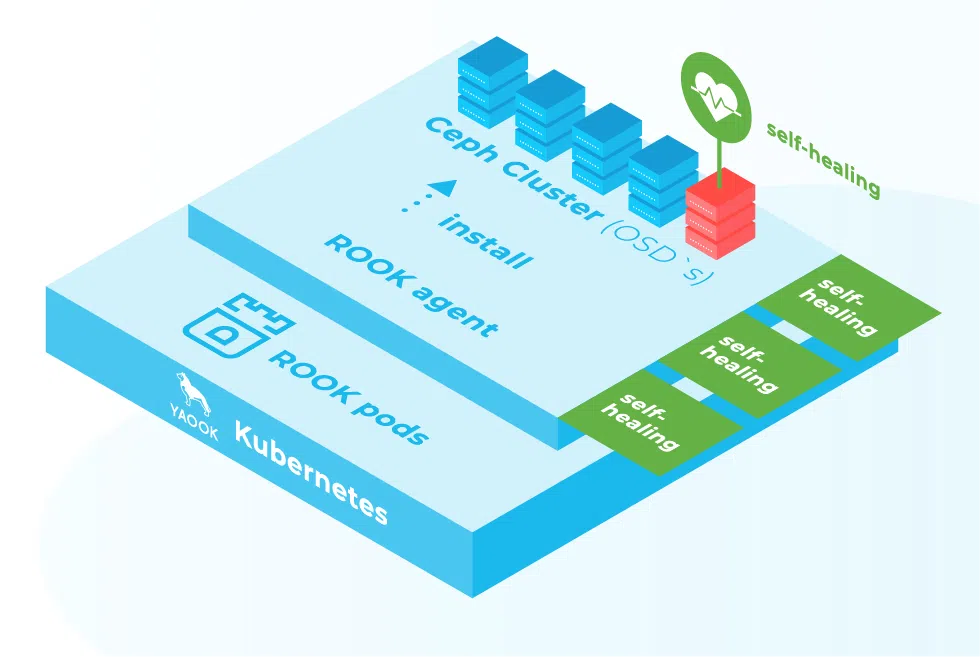
For Ceph setups big and small, running it on Kubernetes should bring k8s’s main benefit: self-healing. Kubernetes will do its best to help the cluster to recover from failures. For the big or growing setups, Kubernetes should also make adding more storage media to the cluster (ie. horizontal scaling) fairly easy. Using Rook and yk8s are just means to achieve a Ceph Cluster on Kubernetes with least effort.A Word on The Structure of this Post and my Setup
In my installation, I followed the official yk8s documentation: https://yaook.gitlab.io/k8s/quick-start.html. In this post, I’ll highlight some choices that the documentation either leaves up to the user or which I needed to configure differently than described for the „base case“ offered by the documentation. The main difference was that the „base case“, at the time of the writing, describes installing yk8s on top of Openstack1. By contrast, my setup consisted of 6 physical Ubuntu 20 servers. 3 of these would act as Ceph monitoring nodes and 3 as Ceph OSDs. All the nodes had a user calleddeployer that I was able to ssh and that had sudo rights on the nodes.
Setting up a Kubernetes Cluster to Run Ceph on
How to setup a yk8s is described rather well by the project’s official documentation: https://yaook.gitlab.io/k8s/quick-start.html In short, the documentation walks one through the following steps:- Installing and setting up all pre-requisites
- Initializing the cluster repository ie. a git repository in which one stores the confguration of their yk8s cluster and from which one runs the scripts to set the cluster up
- Configuring the yk8s cluster
- Creating the cluster
.envrc file:
export TF_USAGE=false
export WG_USAGE=false
true when running yk8s on top of Openstack.
After the cluster repository initialization step, I had to create a hosts file (for Ansible, which the yk8s setups scripts use). I placed this file (called hosts) under inventory/02_trampoline/ and inventory/03_k8s_base inside the cluster repository and it looked somewhat like this:
[all:vars]
ansible_python_interpreter=/usr/bin/python3
dualstack_support=False
networking_fixed_ip=<depends-on-your-network-setup>
on_openstack=False

[k8s_nodes:children]
masters
workers

[frontend:children]
masters

[masters]
yk8s-master-1 ansible_host=<a-hostname-to-ssh-the-local_ipv4_address-further-down-this-line> ansible_user=deployer local_ipv4_address=<depends-on-your-network-setup>
yk8s-master-2 ansible_host=<a-hostname-to-ssh-the-local_ipv4_address-further-down-this-line> ansible_user=deployer local_ipv4_address=<depends-on-your-network-setup>
yk8s-master-3 ansible_host=<a-hostname-to-ssh-the-local_ipv4_address-further-down-this-line> ansible_user=deployer local_ipv4_address=<depends-on-your-network-setup>

[workers]
osd-machine-1 ansible_host=<a-hostname-to-ssh-the-local_ipv4_address-further-down-this-line> ansible_user=deployer local_ipv4_address=<depends-on-your-network-setup>
osd-machine-2 ansible_host=<a-hostname-to-ssh-the-local_ipv4_address-further-down-this-line> ansible_user=deployer local_ipv4_address=<depends-on-your-network-setup>
osd-machine-3 ansible_host=<a-hostname-to-ssh-the-local_ipv4_address-further-down-this-line> ansible_user=deployer local_ipv4_address=<depends-on-your-network-setup>
ansible_user is the deployer that I introduced when discussing the structure of setup.
During the yk8s cluster configuration step, I labelled my nodes already in config.toml. As a reminder, my setup had 3 machines that would act as OSD nodes. Therefore I added something like the following to the labelling section of my config.toml:
[node-scheduling.labels]
osd-machine-1 = ["{{ scheduling_key_prefix }}/ceph-osd=true"]
osd-machine-2 = ["{{ scheduling_key_prefix }}/ceph-osd=true"]
osd-machine-3 = ["{{ scheduling_key_prefix }}/ceph-osd=true"]
Installing Ceph via Rook on the yk8s Cluster
As we at Cloud&Heat use Ceph for storage in our data centers and as we actively participate in the development of yk8s, we have included the possibility to install Ceph via Rook within the yk8s scripts. Before running the relevant script, however, some further cofiguration was needed for my setup. The following points should eventually be addressed by the yk8s issue: https://gitlab.com/yaook/k8s/-/issues/442 and the configuration of these things will be moved toconfig.toml (which means there might be another blog post on the leaner installation process sometime later).
In the following list of configuration steps for Ceph on yk8s, paths are relative to the yk8s cluster repository’s path.
- Comment out everything beyond
- name: Create ceph poolsinmanaged-k8s/k8s-service-layer/roles/rook_v1/tasks/main.yaml - Configure the disks that are to be used by Ceph OSDs in
managed-k8s/k8s-service-layer/roles/rook_v1/templates/v1.6/cluster.yaml. In my case, my 3 OSD nodes had 12 disks each (one disk per OSD) and 2 NMVe drives that were used to deal with the OSD logging (journal). I configured the disks according to their ids instead of something like/dev/sdaas these names could change upon reboots which could have ended wrecking havoc on the 2 disks on each OSD machine that were reserved for functionality other than hosting an OSD. In the end, the relevant config section looked something like:nodes: - name: "osd-machine-1" devices: - name: "/dev/disk/by-id/<disk-id>" config: metadataDevice: "nvme0n1" <+ the 11 additional disks> - name: "osd-machine-2" devices: - name: "/dev/disk/by-id/<disk-id>" config: metadataDevice: "nvme0n1" <+ the 11 additional disks> - name: "osd-machine-3" devices: - name: "/dev/disk/by-id/<disk-id>" config: metadataDevice: "nvme0n1" <+ the 11 additional disks> - I added an additional variable in
managed-k8s/k8s-service-layer/roles/rook_v1/defaults/main.yaml:
and put some things in the cluster templaterook_on_openstack: Falsemanaged-k8s/k8s-service-layer/roles/rook_v1/templates/v1.6/cluster.yamlbehind this variable:
and379 {% if rook_on_openstack %} 380 storageClassDeviceSets: 381 - name: cinder 382 count: {{ rook_nosds }} 383 portable: true 384 {% endif %}442 {% if rook_on_openstack %} 443 volumeClaimTemplates: 444 - metadata: 445 creationTimestamp: null 446 name: data # it is important that the template is called data for rook v1.3 447 spec: 448 resources: 449 requests: 450 storage: "{{ rook_osd_volume_size }}" 451 storageClassName: "{{ rook_osd_storage_class }}" 452 volumeMode: Block 453 accessModes: 454 - ReadWriteOnce 455 {% endif %}
managed-k8s/actions/apply-stage4.sh
Notes
- In case yk8s runs on top of Openstack it is not (as far as I know) used as a basis for another Openstack (Yaook) but to run other applications.


")