In this blog post, you’ll learn how to manage and add custom images in the Cloud&Heat Technologies Horizon dashboard. The dashboard already includes images for popular distributions, which you can easily use for your instances. If you can’t find a distribution in this list, you can add it to your project as Image import.
Requirements
All you need is access to the Cloud&Heat Horizon dashboard with an active project.
View existing images
You can easily access existing images via the menu option Compute > Images View. These images are available worldwide and are provided for you by Cloud&Heat Technologies. You will also find your imported images in this overview once they have been successfully imported.
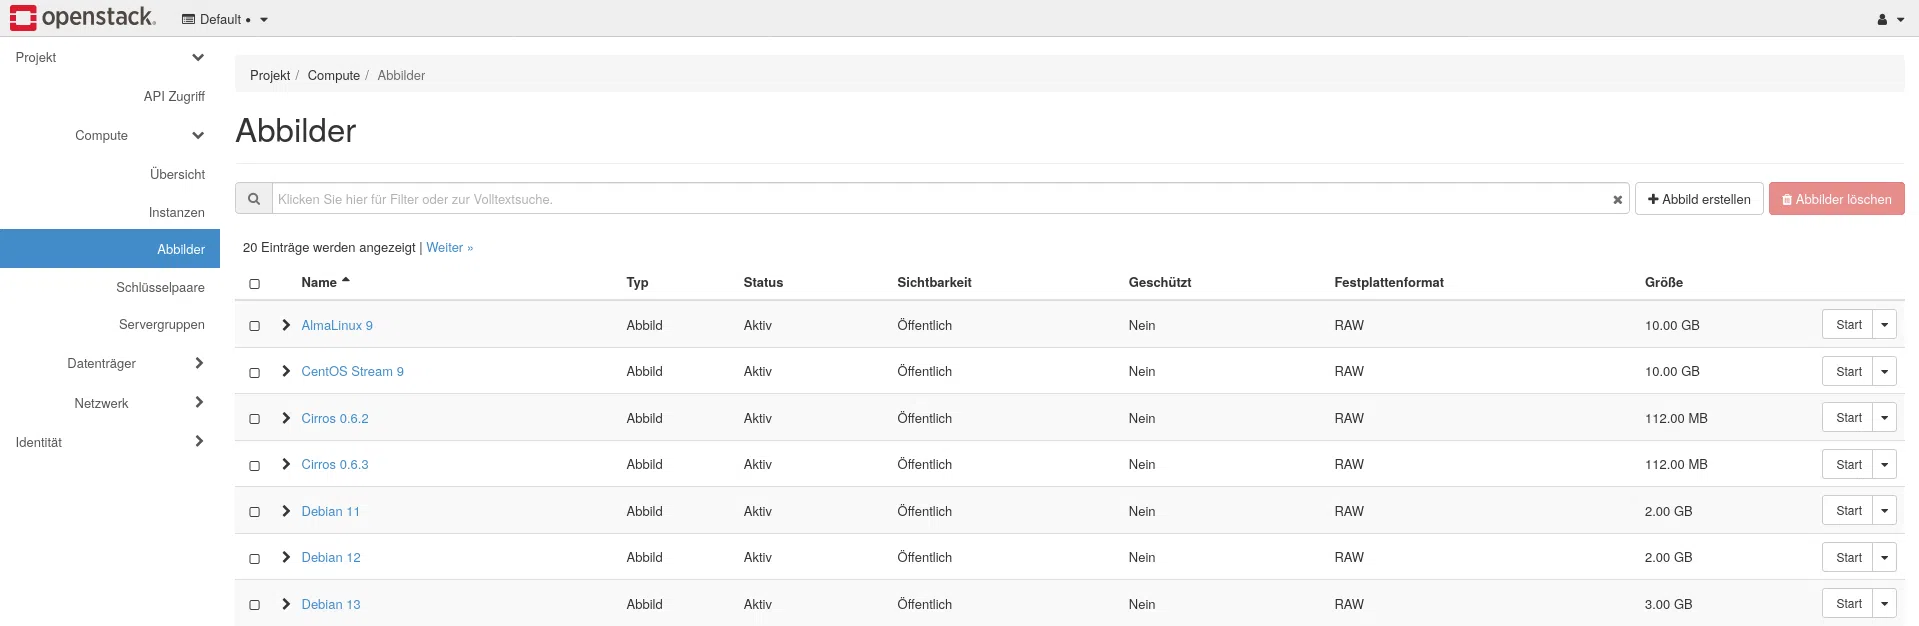
Alternatively, the images can also be listed as usual using the OpenStack CLI:
❯ OpenStack image list -c name -c status
+----------------------+--------+
| Name | Status |
+----------------------+--------+
| AlmaLinux 9 | active |
| CentOS Stream 9 | active |
| Cirros 0.6.2 | active |
| Cirros 0.6.3 | active |
| Debian 11 | active |
| Debian 12 | active |
| Debian 13 | active |
| Fedora Cloud 43 | active |
| Garden Linux 1592.0  | active |
| Garden Linux 1592.1  | active |
| Garden Linux 1592.14 | active |
| Garden Linux 1592.2  | active |
| Garden Linux 1592.3  | active |
| Garden Linux 1877.5  | active |
| Garden Linux 1877.6  | active |
| Garden Linux 1877.7  | active |
| Rocky 9 | active |
| Ubuntu 22.04 | active |
| Ubuntu 22.04 Minimal | active |
| Ubuntu 24.04 | active |
| Ubuntu 24.04 Minimal | active |
| openSUSE Leap 15.6   | active |
+----------------------+--------+
Add an image
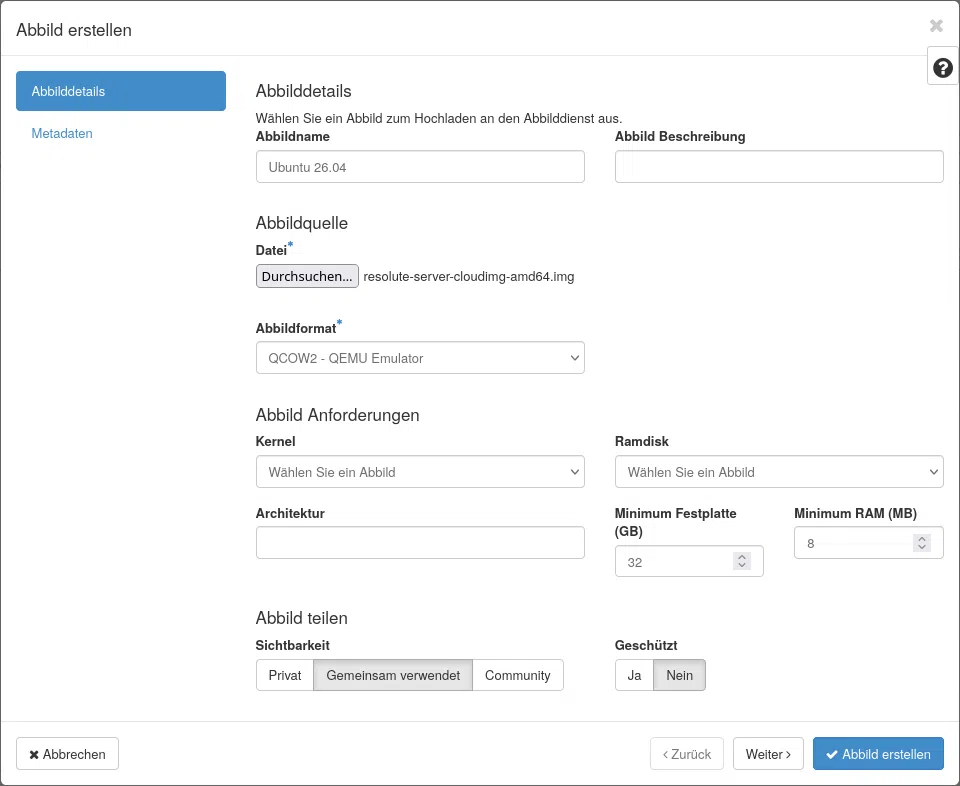
If the image you need is not listed here, you can use the button Create an image under the menu item Compute > Images Import a custom image.
The image format must be the RAW format or, alternatively, the QCOW2 format correspond to.
Adjust the system requirements to match the selected distribution. In the tab Metadata You can configure advanced settings, such as the processor architecture.
Via the OpenStack CLI:
# Import from URL
DISTRO="Ubuntu 26.04 (Custom)"

openstack image create "${DISTRO}" \
  --disk-format qcow2 \
  --container-format cash \
  --private

OpenStack image import "${DISTRO}" \
  --uri "https://cloud-images.ubuntu.com/resolute/current/resolute-server-cloudimg-amd64.img" \
  --method web download \
  --wait
# Import from local file
openstack image create "Ubuntu 26.04 (Custom)" \
--file /path/to/resolute-server-cloudimg-amd64.img \
--disk-format qcow2 \
--container-format cash \
--private
# Import from local file
openstack image create "Ubuntu 26.04 (Custom)" \
  --file /path/to/resolute-server-cloudimg-amd64.img \
  --disk-format qcow2 \
  --container-format cash \
--privateOpenStack image list -c name -c status
+-----------------------+--------+
| Name | Status |
+-----------------------+--------+
| [...] | [...] |
| Ubuntu 26.04 (Custom) | active |
| [...] | [...] |
+-----------------------+--------+Deleting a custom image
Custom images can also be accessed via the menu option Images can be deleted again. To do this, locate your image and select the option from the drop-down menu Delete image.
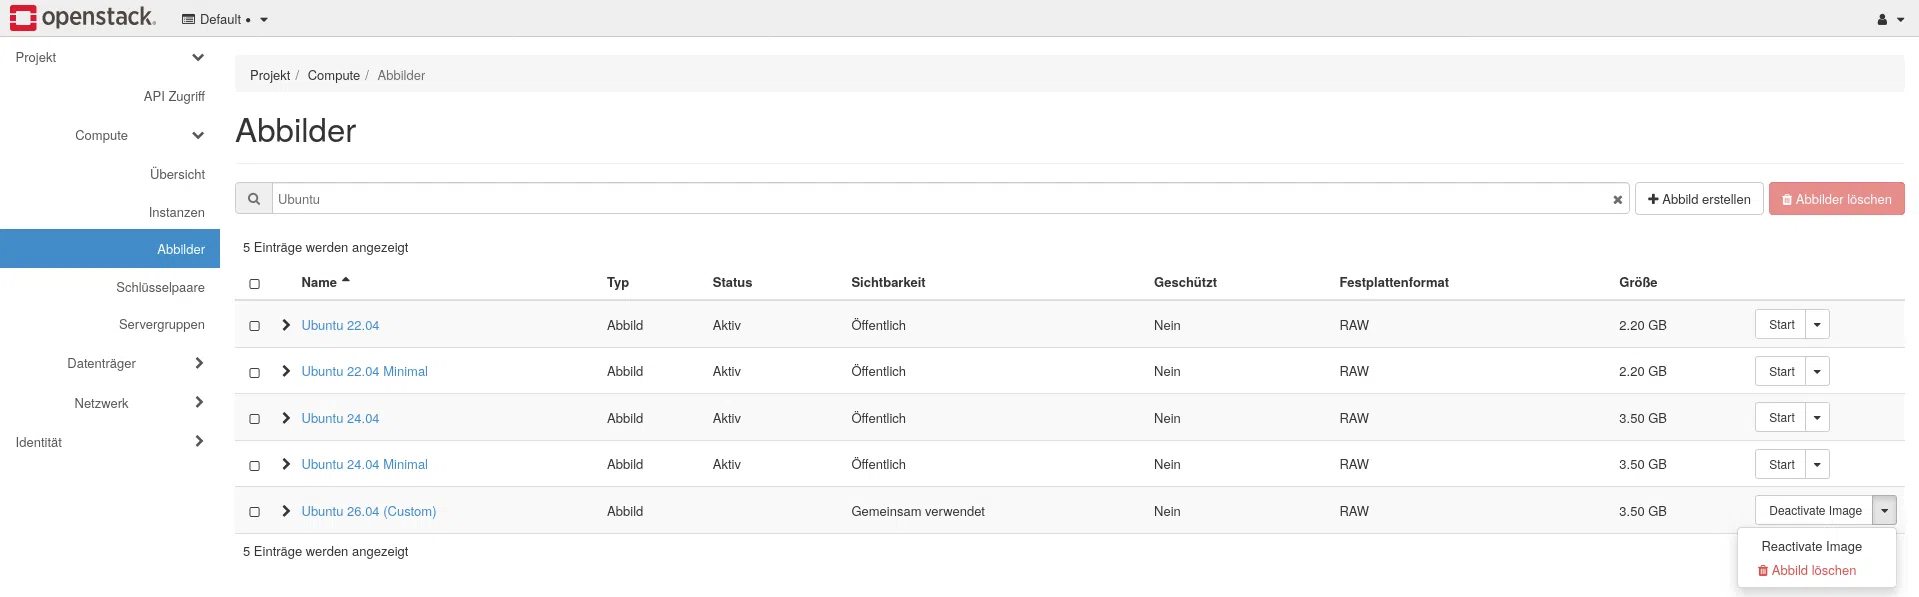
OpenStack CLI:
delete OpenStack image "Ubuntu 26.04 (Custom)"
OpenStack image list -c name -c status
You can find further tutorials on working with OpenStack cloud environments here.
Contact
Are you not yet using our OpenStack cloud and interested in our IaaS? Please feel free to get in touch.

Max Böttcher