

Cloud service and
Cloud technology-
Provider
Cloud service and
Cloud technology provider
Suche

Our mission
Green, Open, Efficient

Blog.

Getting started with the OpenStack cloud: Creating networks and floating IPs in OpenStack

Written by Tobias Hering
Blog | Getting started in the cloud: Setting up networks and floating IPs in OpenStack

Introduction

In this blog post, you’ll learn how to create networks and set up a floating IP. By default, instances aren’t accessible from outside, as they’re located on internal networks. This is sufficient for instances without public access. However, if you require public access to your instance, a floating IP is absolutely essential.

Requirements

You will need access to the Cloud&Heat Horizon dashboard and an active project.

Setting up an internal network

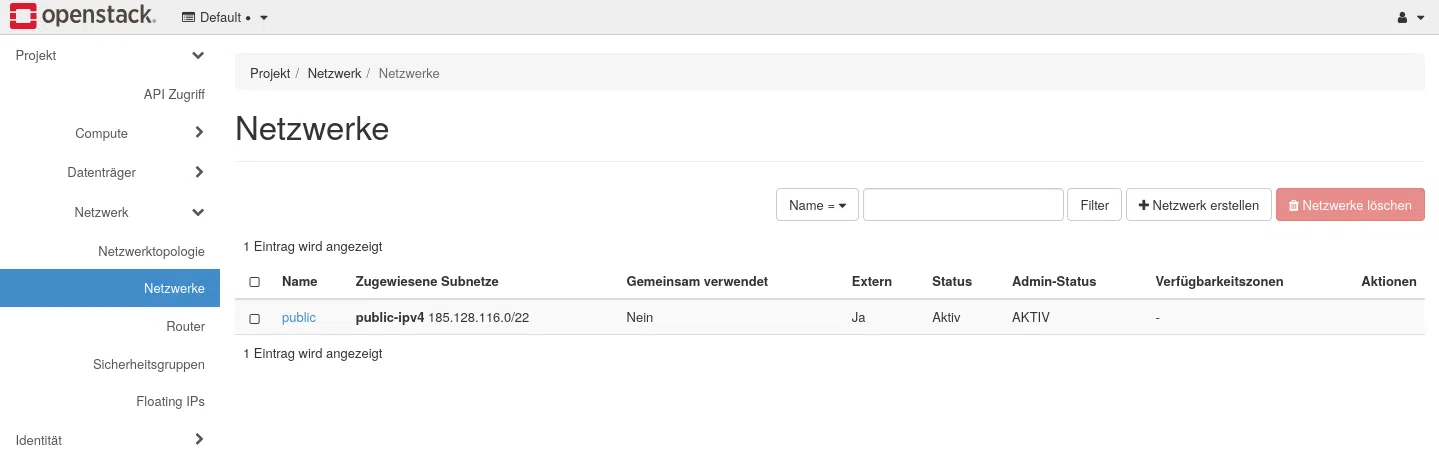
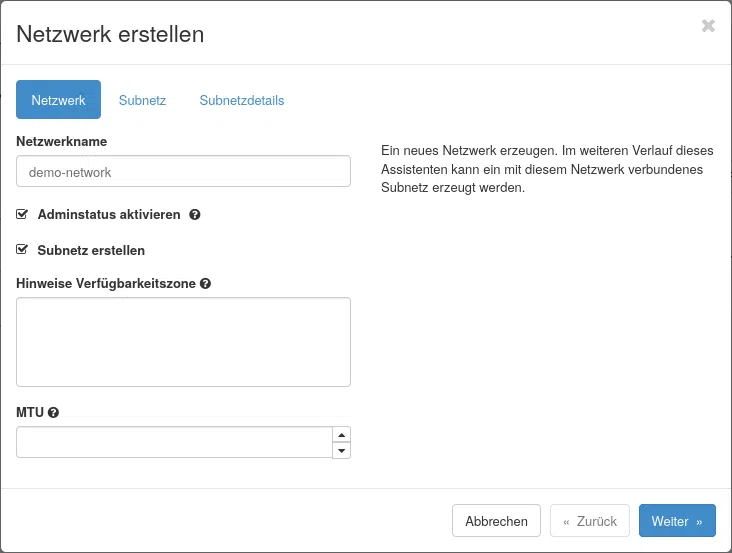
Create a new network via the menu option Network > Networks and click on the button Create a network.

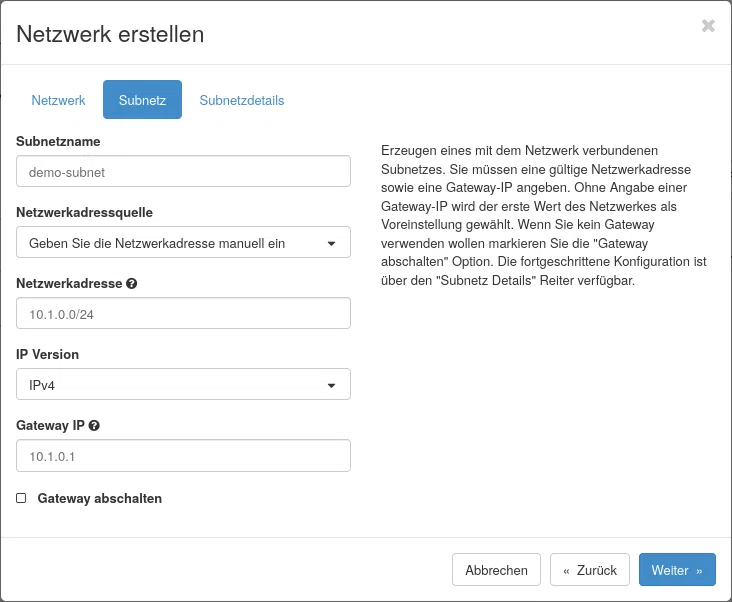
Set the subnet there demo subnet . The Network address or --subnet-range describes the entire private address range in CIDR notation. In the example, this comprises 10.1.0.0/24 the addresses of 10.1.0.0 to 10.1.0.255. The gateway IP 10.1.0.1 will later be assigned to the router’s internal interface.

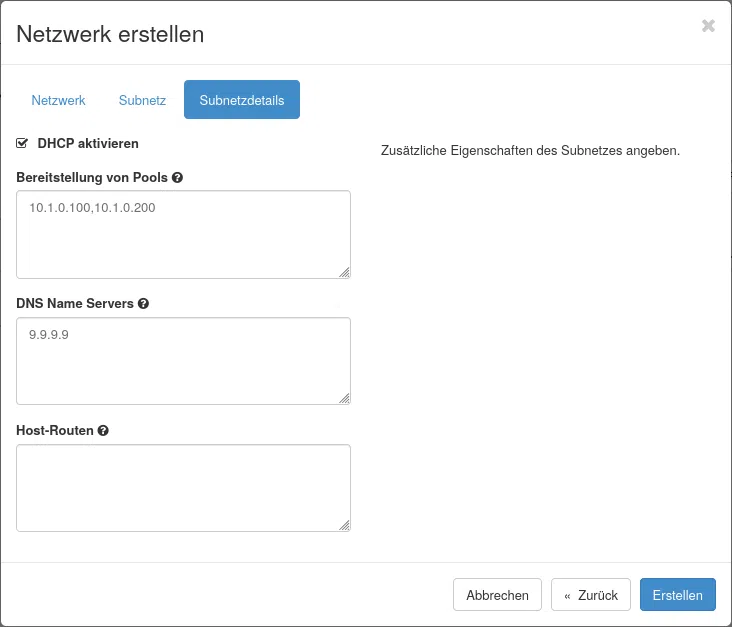
Under Subnet details enables DHCP. The Provisioning pool or --allocation-pool specifies which addresses OpenStack is permitted to assign automatically to ports. It must be within the subnet. In the example, the addresses 10.1.0.100 to 10.1.0.200 used. Gateway and reserved addresses should not be included in this pool. You should also enter a DNS name server.

Or, alternatively, using the OpenStack CLI:

openstack network create demo-network
openstack subnet create demo-subnet \
    --network demo-network \
    --subnet-range 10.1.0.0/24 \
    --gateway 10.1.0.1 \
    --allocation-pool start=10.1.0.100,end=10.1.0.200 \
    --dns-nameserver 9.9.9.9


Create a router

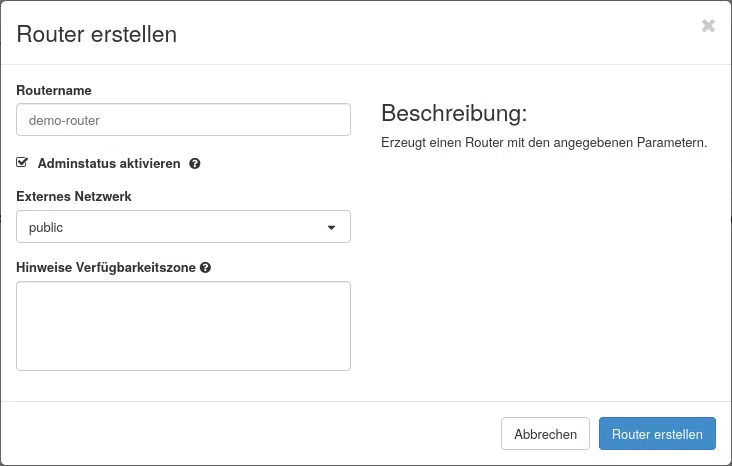
A router forwards data packets between your networks and is responsible for routing between them. In the example given in the blog post, we have the networks demo subnet as well as the public network interface public, which are to be linked together.

In the next step, set up a router that connects the internal network to a floating IP. You can set up a floating IP beforehand via the menu option Network > Floating IPs generate.

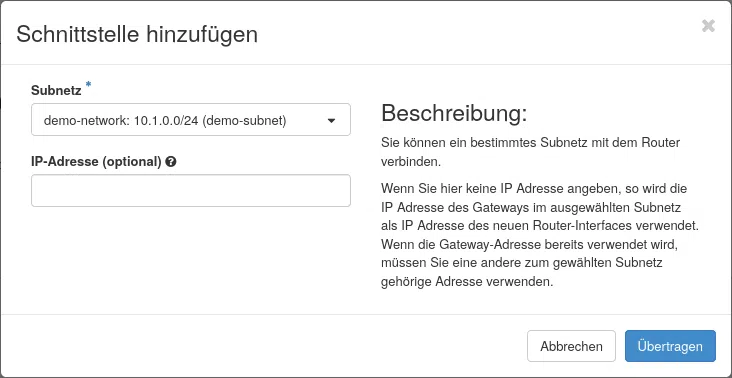
Next, open the router you have created and go to the tab Interfaces. Click on Add interface and select demo subnet from. Horizon uses the configured gateway IP for this 10.1.0.1.

Using the OpenStack CLI:

openstack router create demo-router
OpenStack router set --external-gateway public demo-router
openstack router add subnet demo-router demo-subnet


Final state of the network

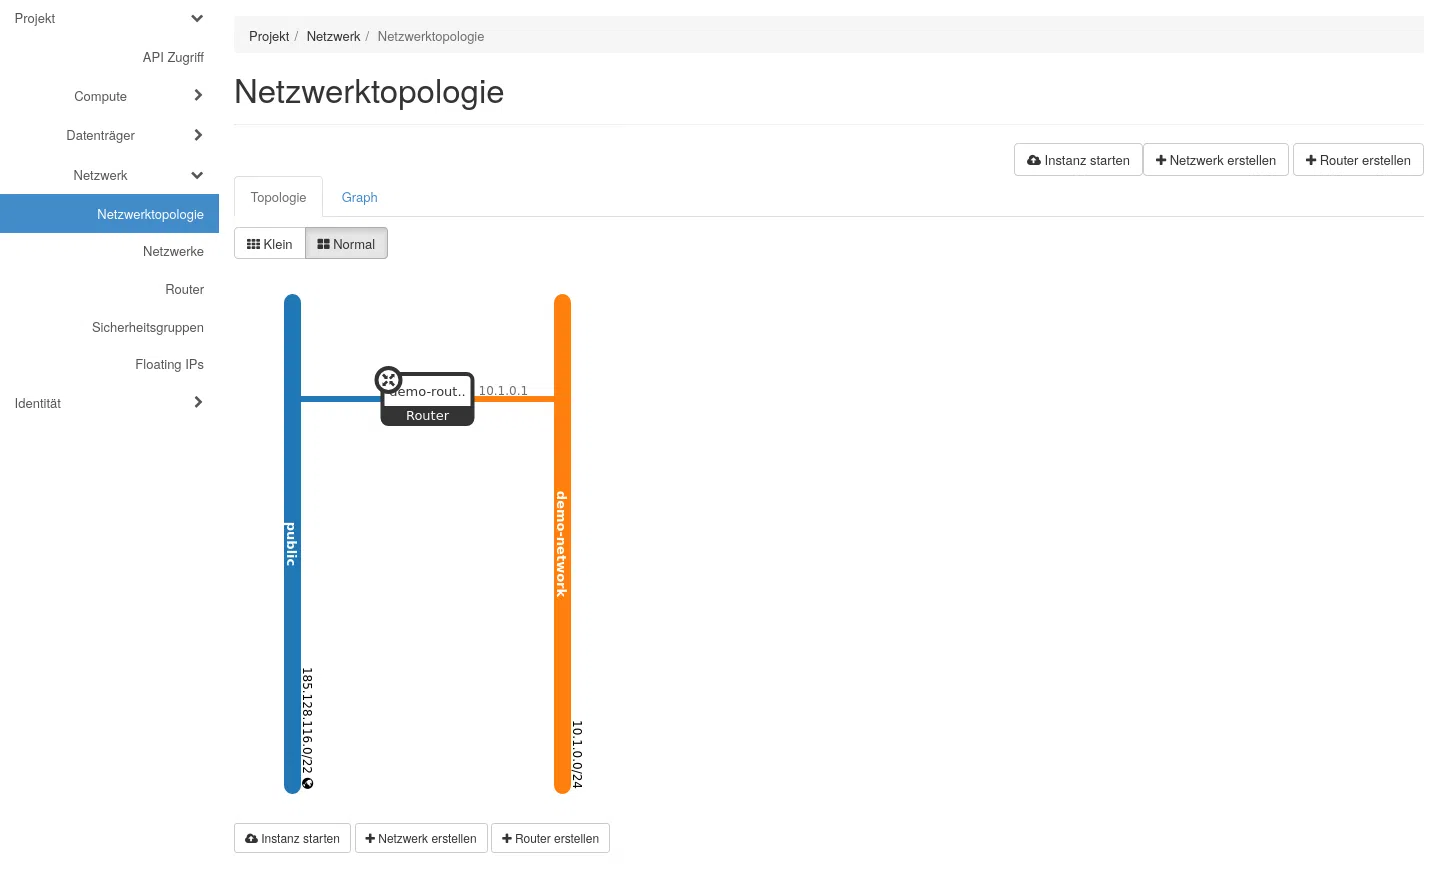
You can view the current status of your network topology under the menu item Network > Network topology .

For the example configuration, this should look as follows:

The illustration shows the public network on the left public, on the right the internal demo-network with the address range 10.1.0.0/24 and in between the demo router. An instance and its floating IP are not yet accessible at this stage. They will be created in Chapter 6.

You can find further tutorials on working with OpenStack cloud environments here.

Matching products

Find the right solution for this issue.

Contact

Are you not yet using our OpenStack cloud and interested in our IaaS? Please feel free to get in touch.

max böttcher Sales Engineer Software Solutions

Max Böttcher

Sales
Benjamin Schreier Head of Sales

Benjamin Schreier

Sales

Contact us.

More blog posts

Saxony Stack | Saxony’s ecosystem of IT companies
Saxon IT companies have quietly been building the components of a technology stack to build digital infrastructures for years without anyone giving it a name. Now it has one: the Sachsen Stack.
Blog | Header | First steps in the OpenStack cloud: Creating DNS records with OpenStack Designate
In this blog post, we’ll show you how to use OpenStack Designate to create and manage DNS zones and DNS records directly within an OpenStack environment. This makes it easier for you to manage DNS configurations for applications and services, and ensures that they can be accessed reliably and user-friendly.