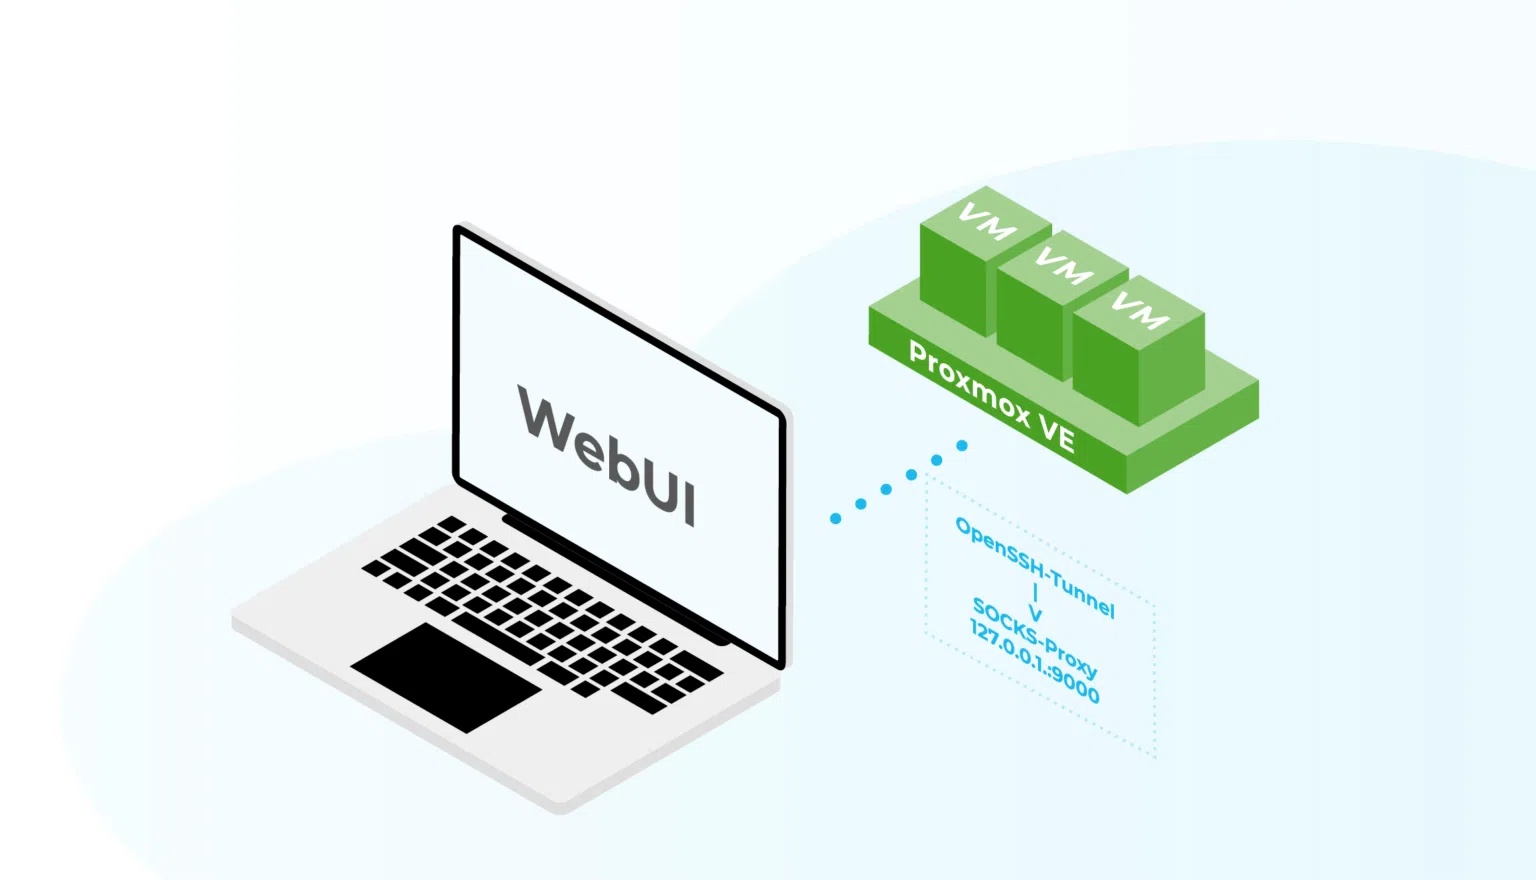
In daily operations, despite the use of "Infrastructure as Code," it is necessary to gain an overview of virtualization environments for error analysis, possibly via a WebUI. For this purpose, access to the Proxmox WebUIs is required, which are accessible via HTTPS on port 8006 (Proxmox Virtual Environment) and port 8007 (Proxmox Backup Server). In many use cases, it is advisable not to make the WebUIs accessible from all network segments, for example, if services are to be provided over the internet.
Many use sophisticated solutions such as VPNs or Jumphosts in combination with remote desktop viewers to secure access. While many of these solutions may be appropriate depending on the application and use case, they generally introduce additional dependencies that must be considered throughout the lifecycle of a solution. At the same time, they represent a security-critical component because they must be accessible from networks classified as insecure (e.g., the Internet). Since these are often corresponding administrative tools, certain availability requirements are associated with them.
Therefore, the intention of this post is to demonstrate very simple, OpenSSH-based solutions that enable stable operation without additional software components and are compatible with all common client operating systems (Linux, Windows, macOS).
What to expect in the blog post:
Requirements
- SSH access to a remote VM (with username and password or SSH key, recommended)
- Firefox on the local machine
SSH client (e.g., OpenSSH) on the local machine (
sshon Linux/macOS,ssh.exeon Windows)
Step 1: Set up SSH connection with SOCKS proxy
- Open a terminal or command line.
- Set up an SSH connection with SOCKS proxy forwarding on a high port (port number > 4096):
ssh -D 9000 -C -N @
-D 9000: Opens the SOCKS proxy on port 9000 on the local machine-C: Enables compression (optional, but recommended for better performance)-N: No remote command execution (optional, only proxy forwarding, without tty)username@remote-vm-ip: Replace this with your username and the IP of the remote VM
Note: The SSH connection must remain open for the duration of the access and serves as a tunnel for TCP/UDP traffic.
Step 2: Configure Firefox settings for SOCKS proxy
- Open the Firefox browser on the local machine
- Open the settings (Burger menu > Settings) and search for "SOCKS proxy". Alternatively, access it via about:preferences#connectionSecurity in the URL bar.
- Select "Configure Proxy"
- Enable the option "Manual proxy configuration"
- Use the following proxy configuration:
- SOCKS host: 127.0.0.1
- Port: 9000
- Enable "SOCKS v5"

6. Click "OK“ or "Save“.
Step 3: Connect to the WebUI via SSH and SOCKS
- Start the SSH connection (Step 1).
- Open the Firefox browser and access a website, e.g., the administrative WebUI.
- The requests are now routed through the SOCKS proxy on the remote VM. This allows access to the WebUI in an otherwise unreachable network segment.
Step 4: Optional - Automation with SSH Config
For frequently used connections, the SSH configuration can be automated:
Edit the SSH configuration file (
~/.ssh/configon Linux) or a file referenced via anIncludestatement:vi ~/.ssh/configAdd the following entries:
Host remote-vm
    HostName
    HostKeyAlias remote-vm
    User
    DynamicForward 9000
    Compression yes
The connection can then be established with the following command:
ssh -N remote-vm
Step 5: Optional - Managing Multiple Environments
If multiple environments need to be managed, the Firefox plugin "Firefox Multi-Account Containers" provided by Mozilla can be very useful.
However, generally tunneling all browser traffic can be very cumbersome or even dangerous in daily operations. For example, when browsing the internet with an active proxy, the public IP addresses of the deployments can be associated with the websites accessed.
Open the Add-ons/Extensions tab via the URL bar with
about:addons.Search for the plugin "Firefox Multi-Account Containers".
After installation, the plugin will be available in the toolbar.

4. Additional containers for each environment can be added under "Manage Containers".


5. After creating a new container, the corresponding proxy setting can be made under "Manage Containers" by selecting the new container and then under "Advanced Proxy Settings".


General proxy settings are no longer required.
A new tab can be opened in the desired containerized environment by right-clicking on the new tab button and selecting the appropriate container.
Security Notes
Finally, two simple security tips:
- Using SSH keys with current key algorithms instead of passwords significantly improves security.
- Limit the SOCKS proxy to localhost (
127.0.0.1) to make it usable only locally.