


Cloud service and
Cloud technology-
Provider
Cloud service and
Cloud technology provider
Suche

Our mission
Green, Open, Efficient

Blog.

Getting started with the OpenStack cloud: Creating load balancers with OpenStack Octavia

Written by Maximilian Brandt
CloudandHeat | Header | Getting started with the OpenStack cloud: Creating load balancers with OpenStack Octavia

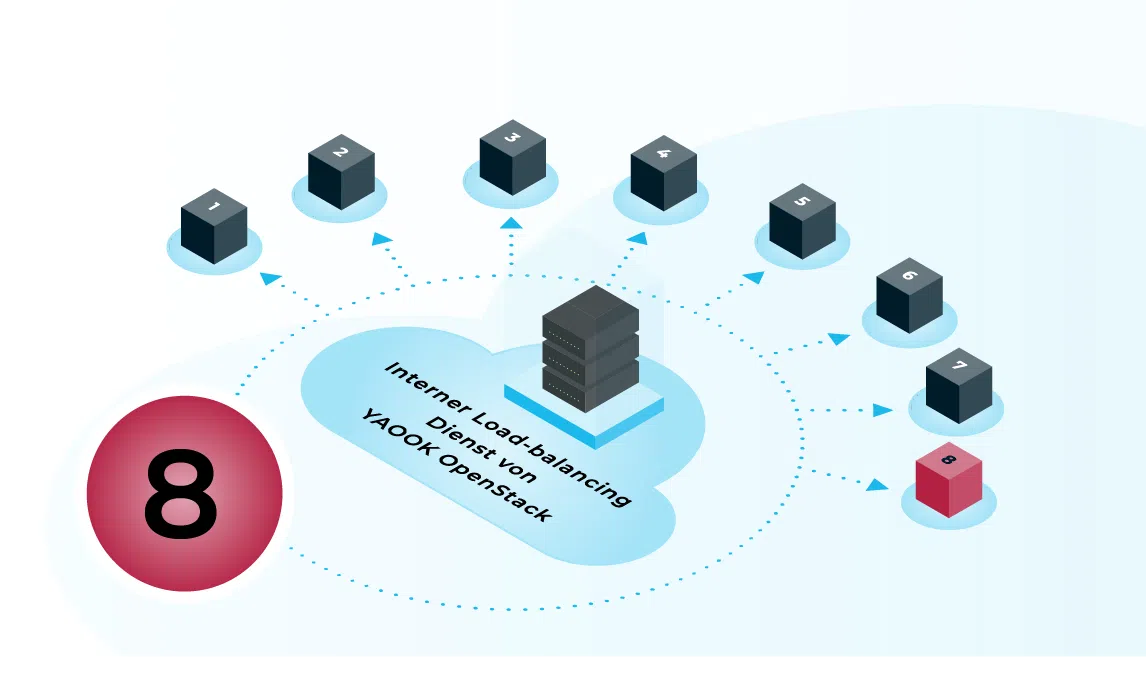
OpenStack Octavia is a Load Balancer as a Service (LBaaS) project that enables the creation and management of load balancers in an OpenStack environment. Octavia distributes incoming traffic across multiple backend servers, thereby helping to improve the availability and scalability of applications.

An Octavia Load Balancer consists of several components:

  • Load balancer: The central component that receives incoming traffic and forwards it to the backend servers.
  • Listener: Defines the port and protocol through which the load balancer accepts traffic.
  • Pool: A group of backend servers to which traffic is distributed.
  • Health Monitor: Monitors the status of the backend servers and ensures that only functioning instances receive traffic.

Requirements

Before creating a load balancer using OpenStack Octavia, a number of basic prerequisites should be met:

  • A private network with a subnet that can be used for the load balancer
  • A router connected to this private network
  • Back-end servers (e.g. VMs) that will subsequently receive traffic from the load balancer

Setting up a load balancer

1. Access to the OpenStack dashboard

First, log in to the OpenStack Dashboard (Horizon) and select the section in the left-hand navigation bar Load Balancers Open. Then go to Create Load Balancer Click.

2. Configure the load balancer

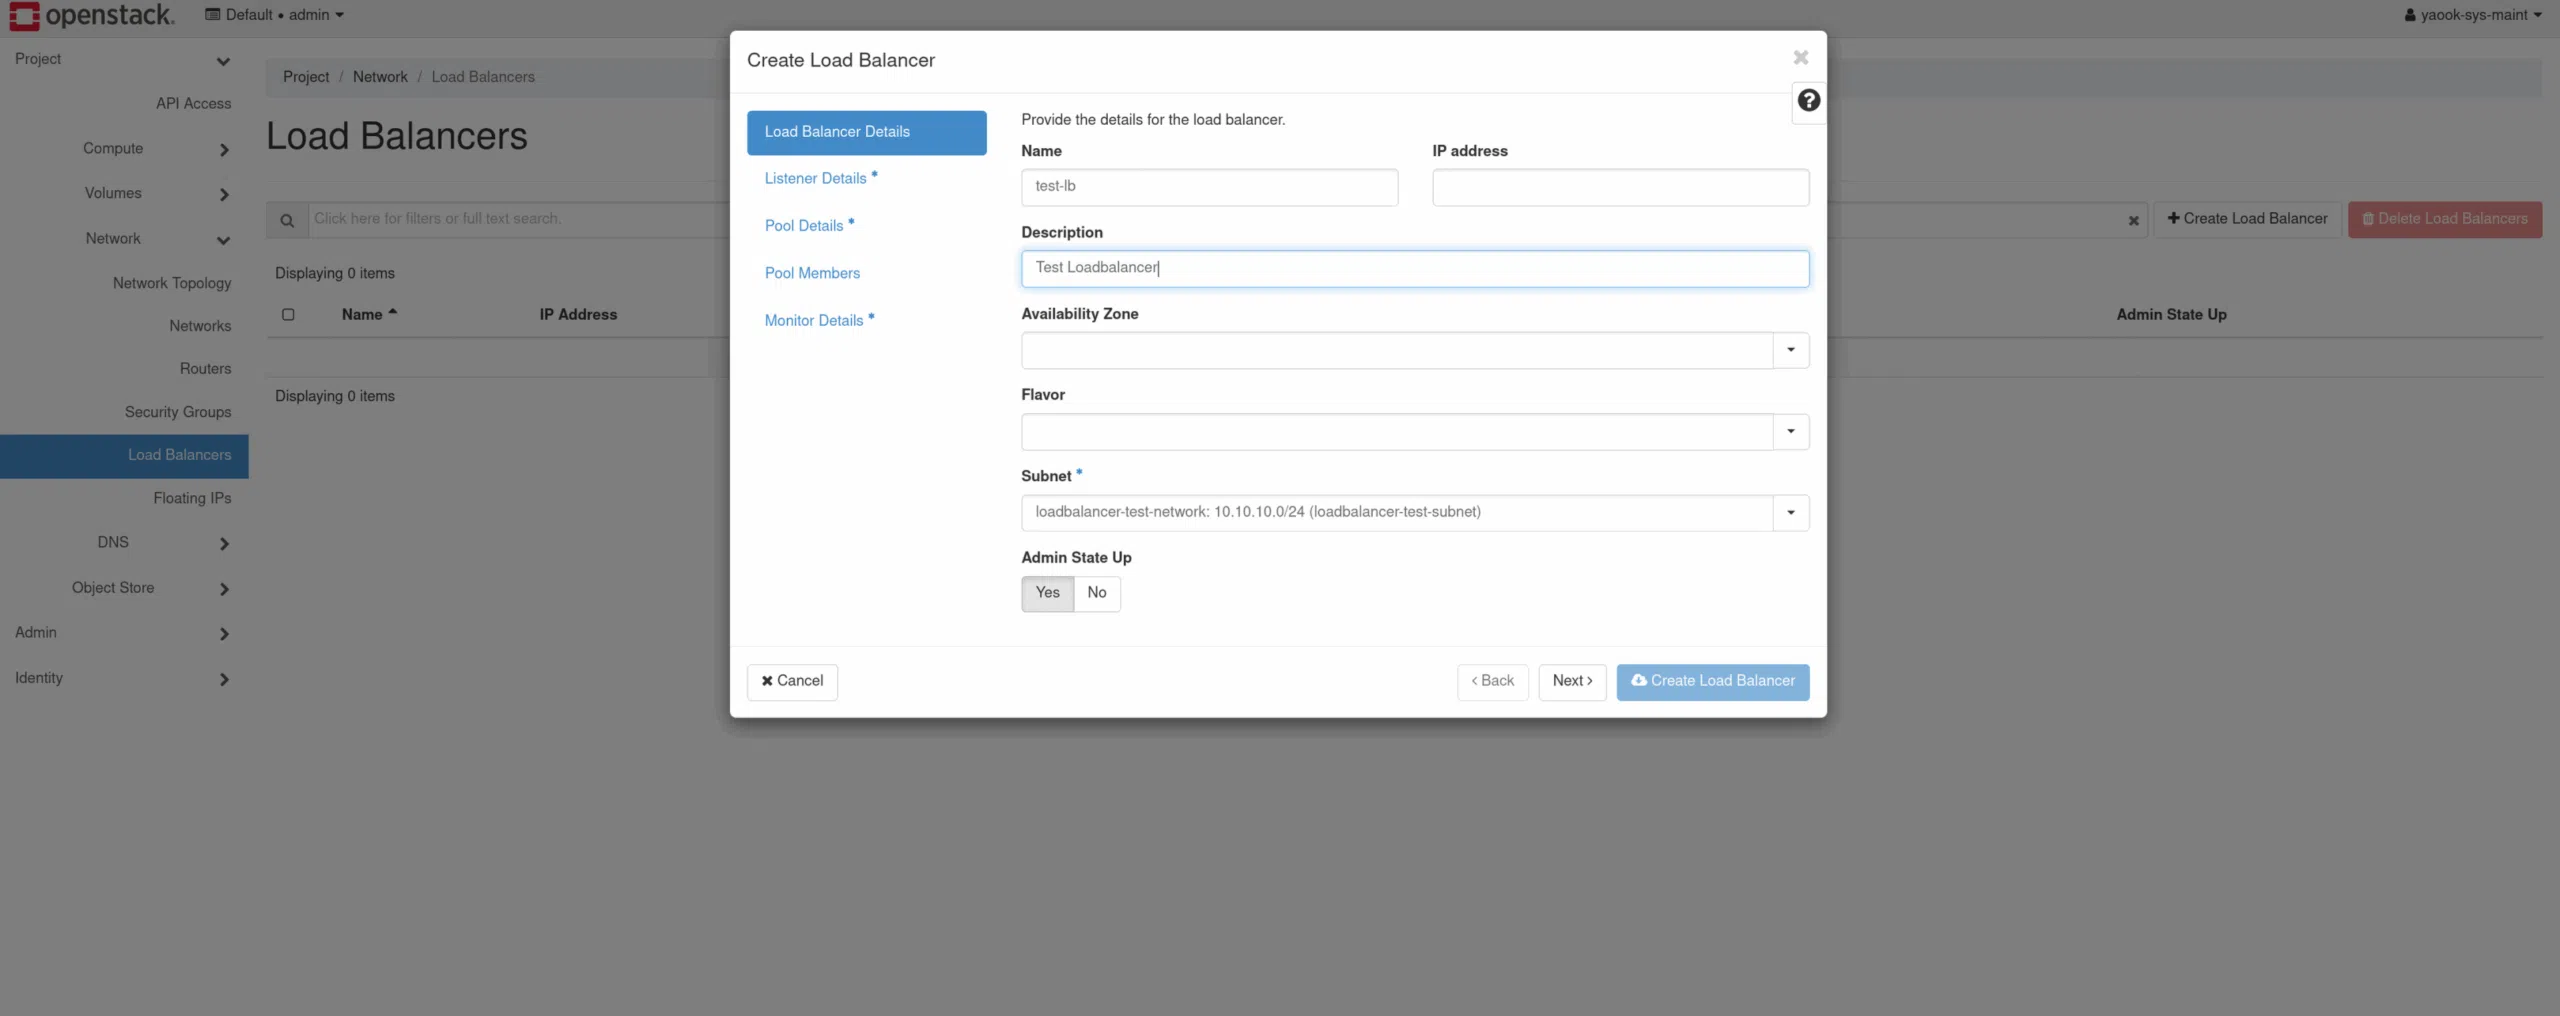
The first step is to assign a name to the load balancer. Next, select the private subnet containing the backend VMs that are to use the load balancer. Then, proceed with "Next. continue.

3. Create a listener

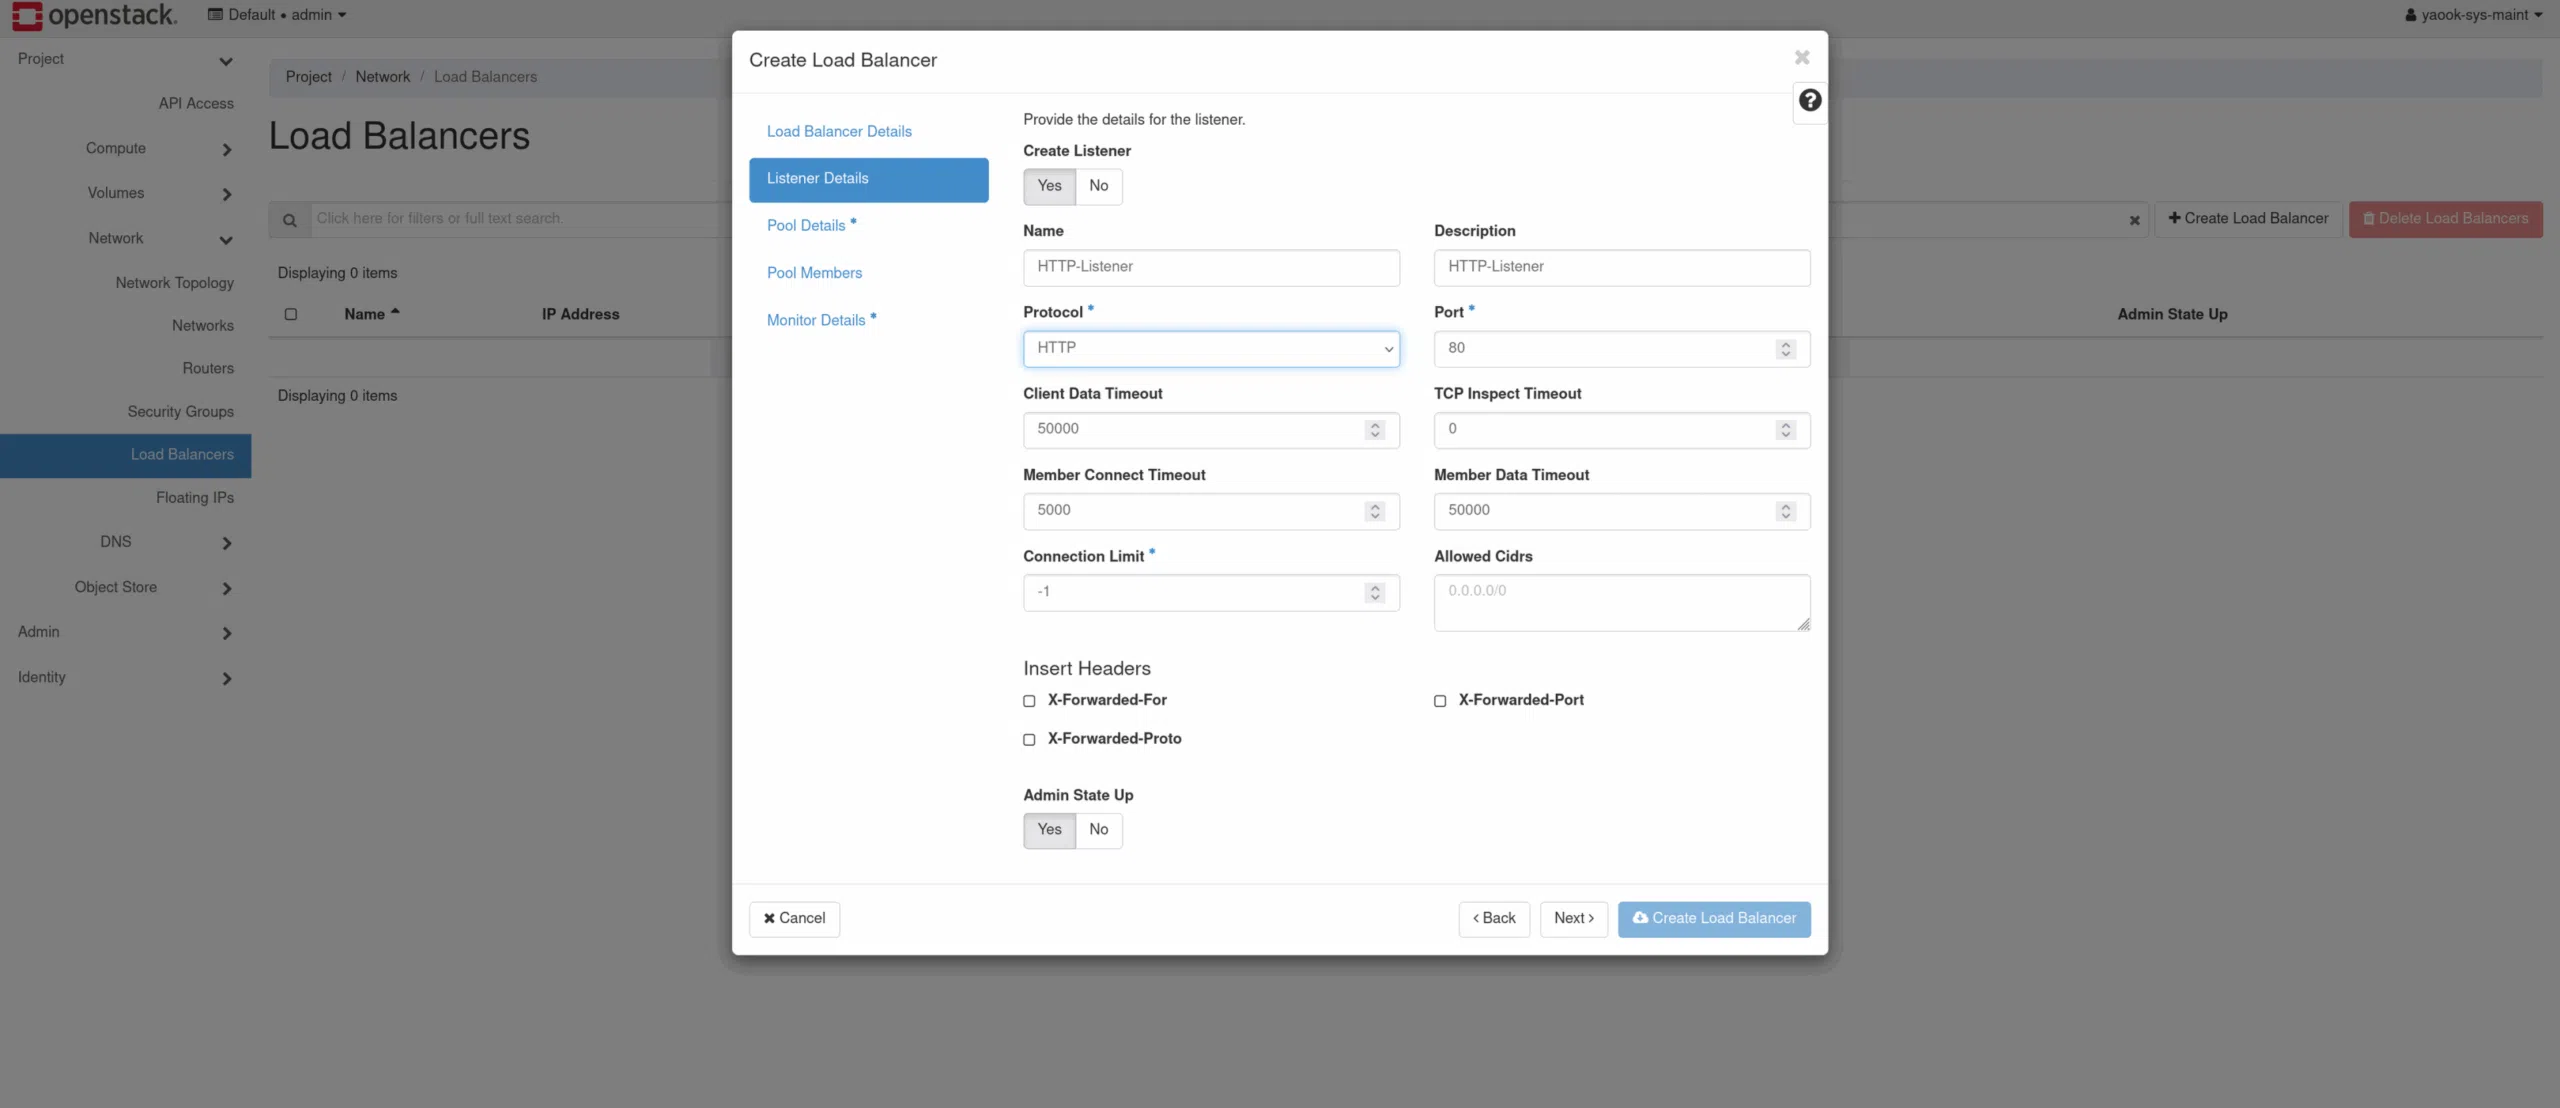
A listener is now created. This specifies the port and protocol via which the load balancer accepts incoming traffic.

By default, Horizon suggests Port 80 and HTTP by default, but these values can be adjusted as required.

To ensure that the listener is active straight away, ‘Create Listener’ and ‘Admin State Up’ should remain enabled. Then, using "Next. continue.

4. Create a pool

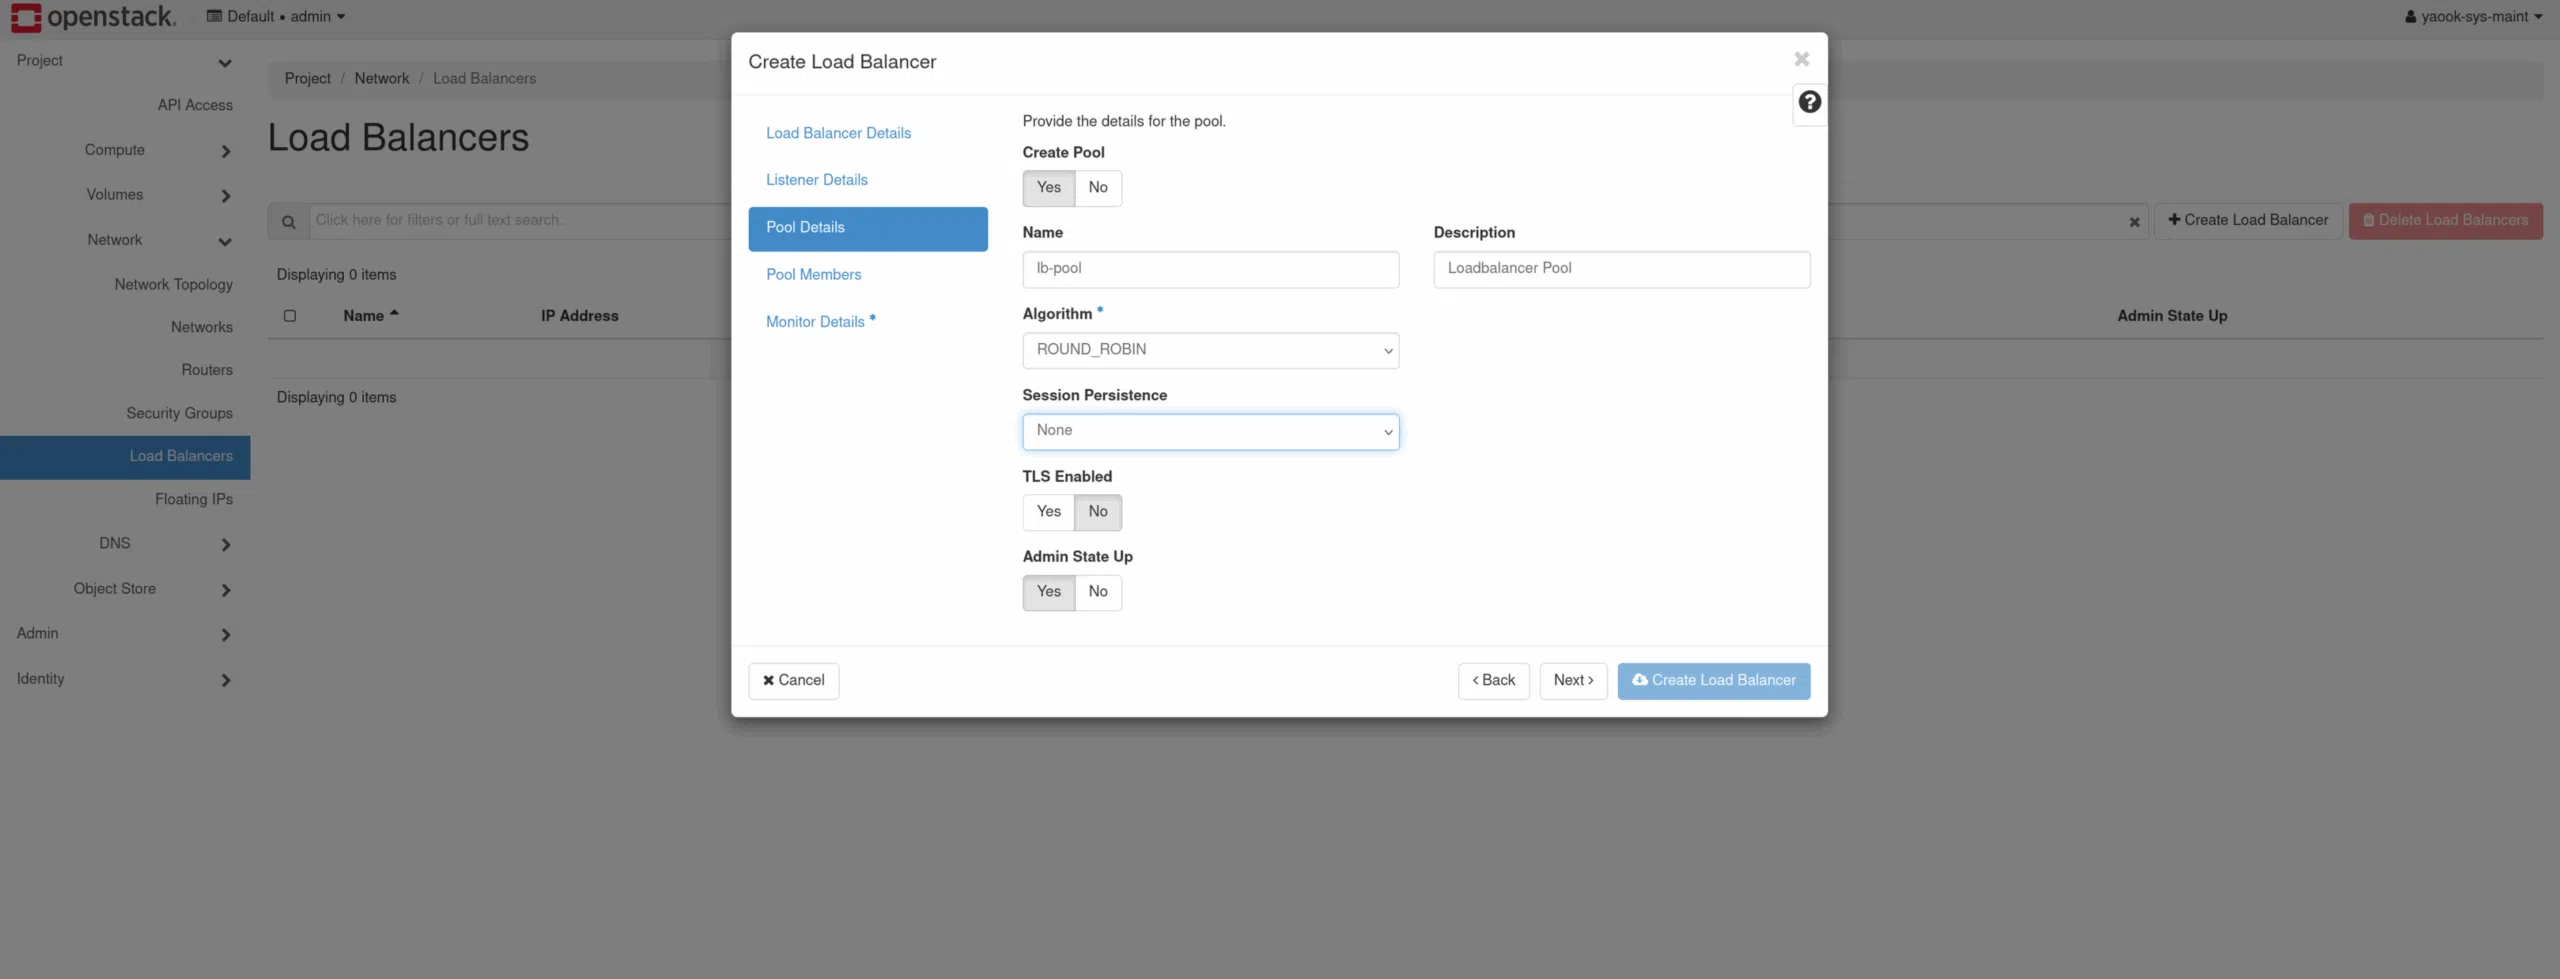
The next step is to define a pool. To do this, a name is assigned and a Load-balancing method selected, which determines how traffic is distributed across the backend servers:

  • Round Robin: Even distribution across all backend servers

  • Least Connections: Forwarding to the server with the fewest active connections at present

  • Source IP: Requests from the same source IP address always go to the same backend server

Here, too, one should Create Pool and Admin State Up remain enabled so that the pool is ready for immediate use. Then, using "Next. continue.

5. Add pool members

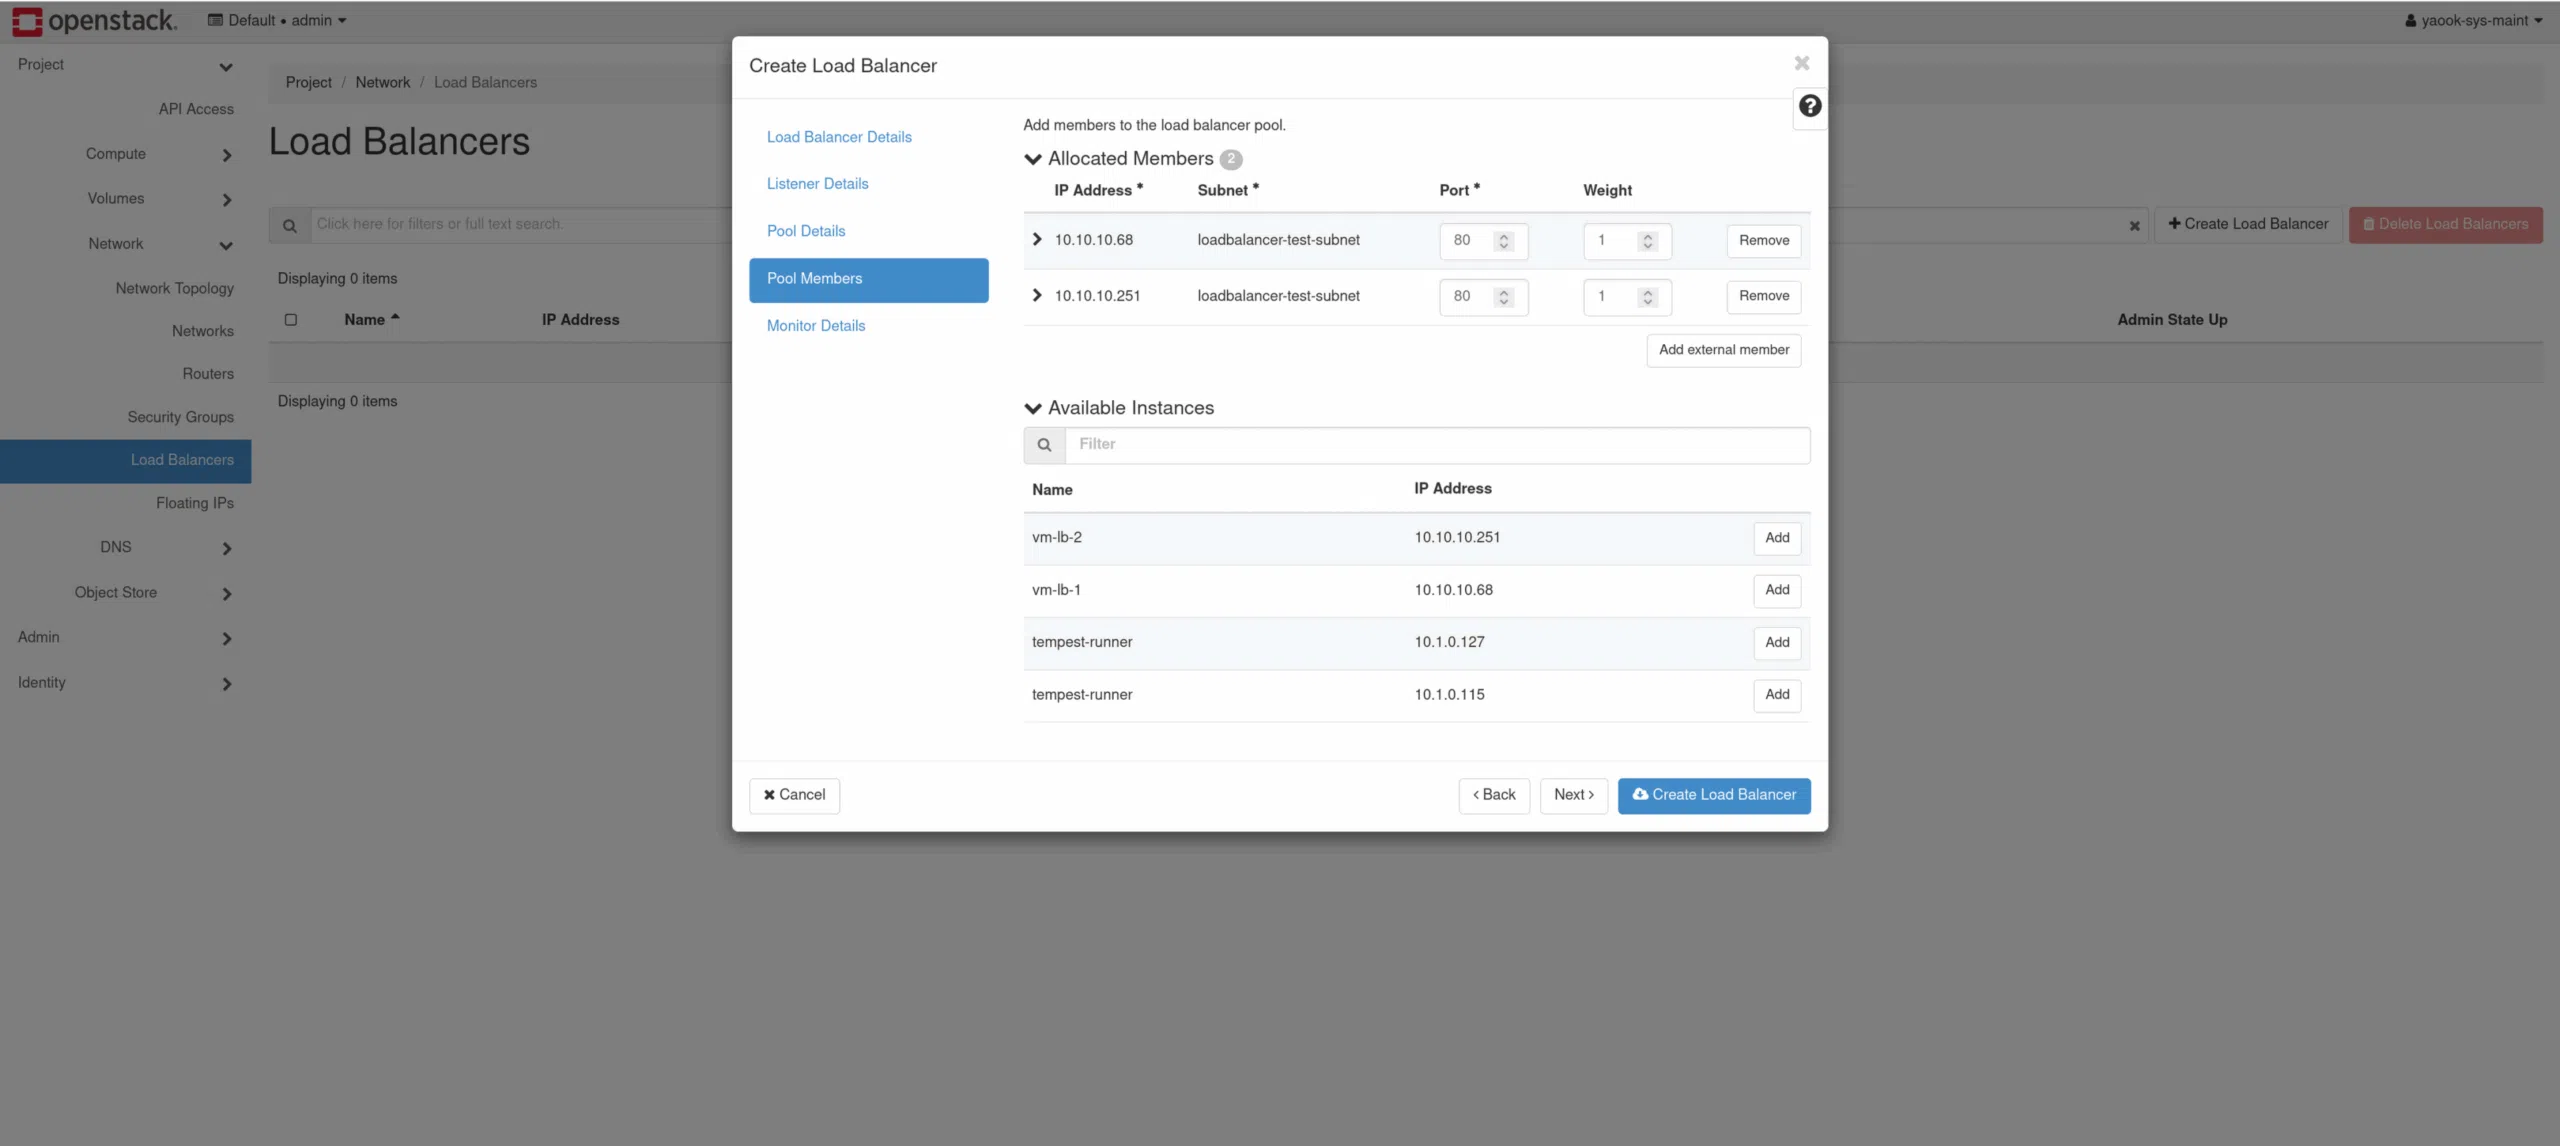
The pool is then assigned the Members added. These correspond to the backend servers that receive traffic from the load balancer.

About Add Member All the required servers can be added one after the other. For each member, the port on which the respective application is accessible on the backend server is specified.

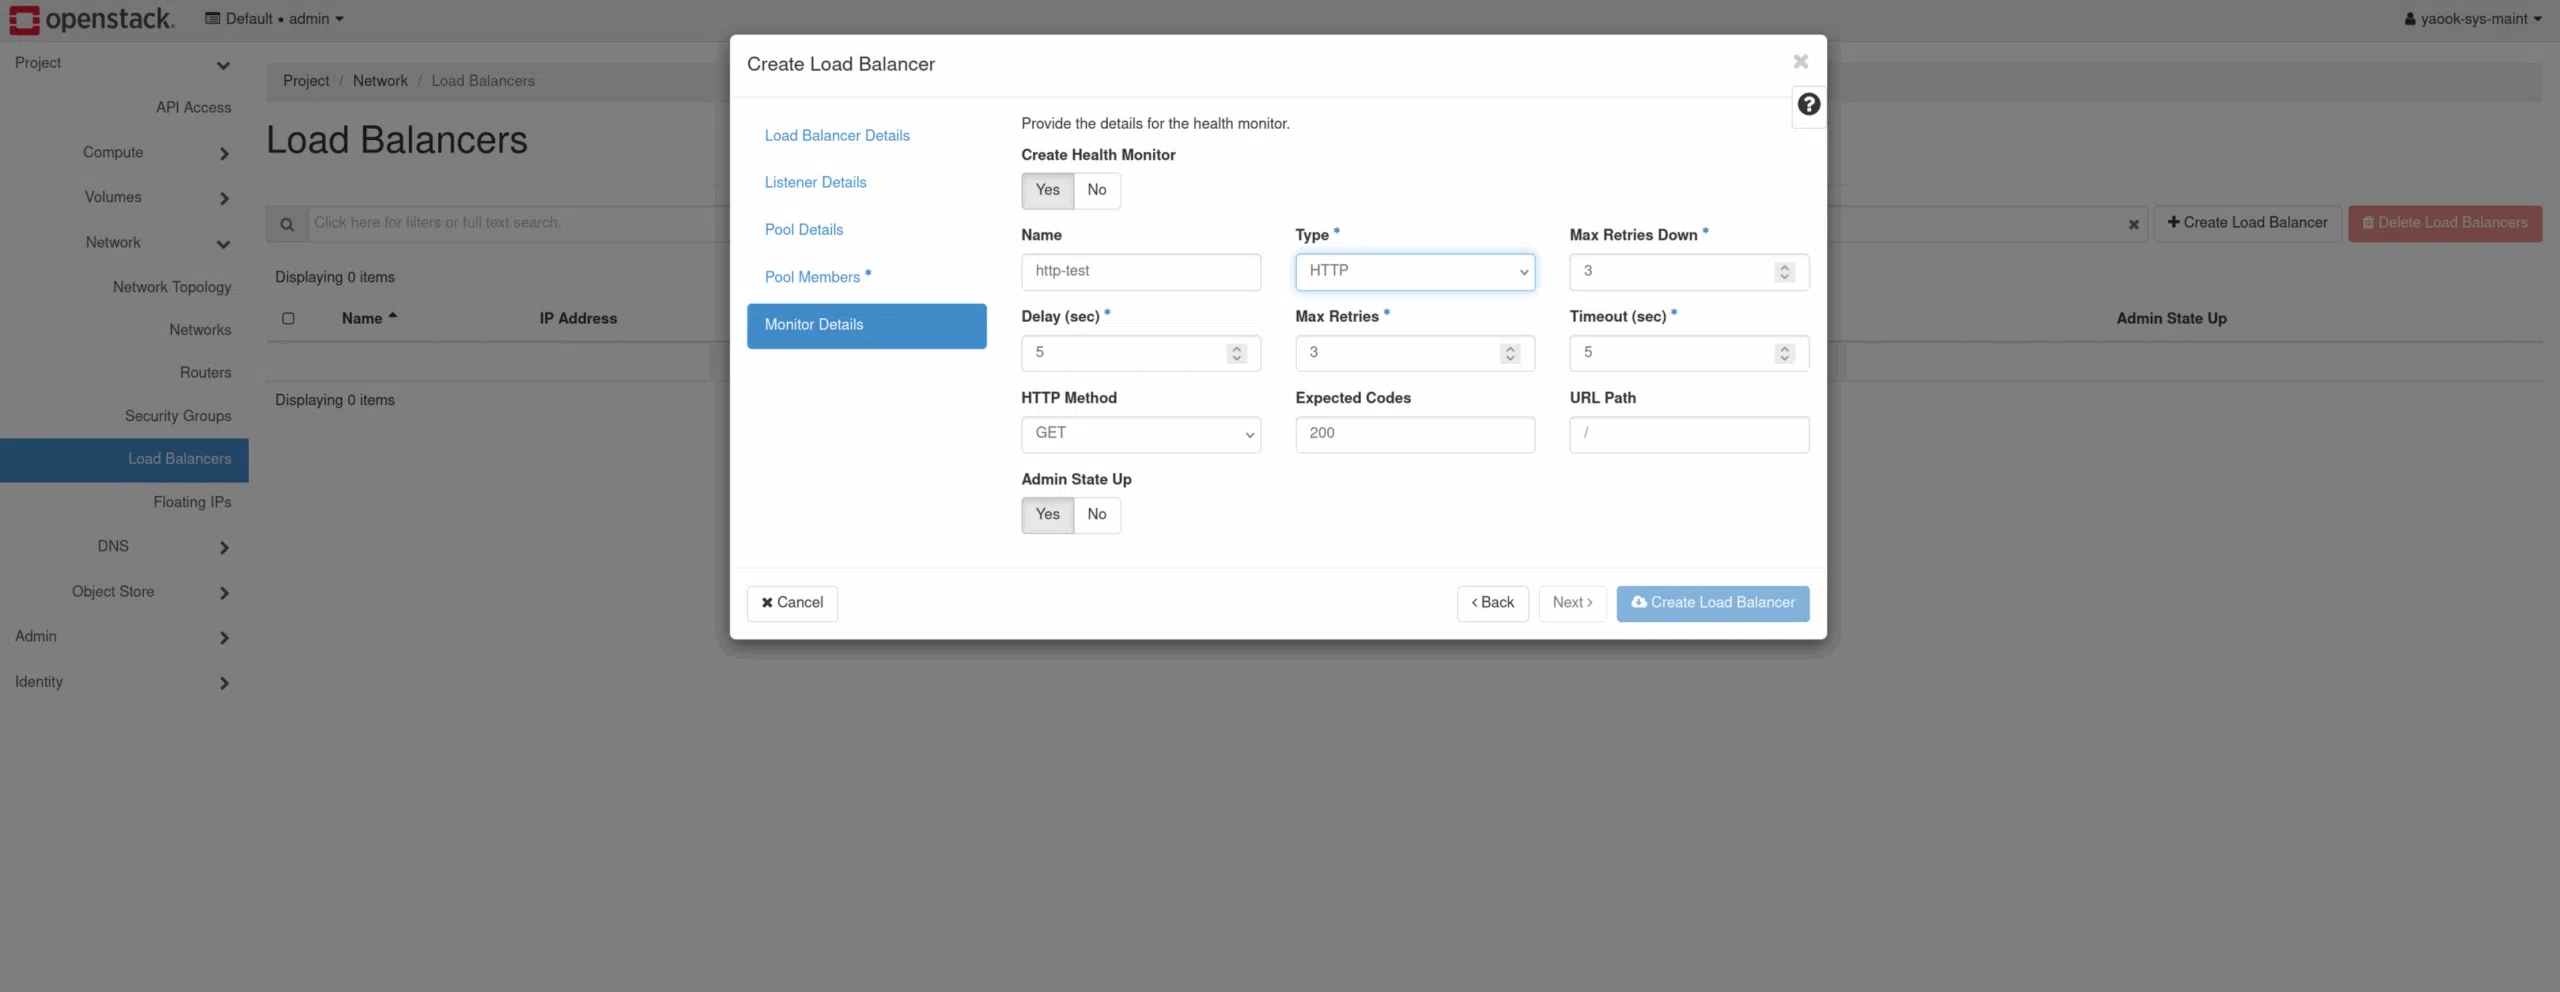
6. Health Monitor (optional)

Optionally, you can now Health Monitor are created to monitor the status of the backend servers. To this end Create Health Monitor Select this option and configure the type (e.g. HTTP, HTTPS or TCP), as well as the intervals and thresholds.

The Health Monitor regularly checks the availability and responsiveness of the servers. If a backend is detected as „unhealthy“, it is automatically cut off from traffic until it is deemed healthy again.

Once the configuration is complete, the process can be started with Create Load Balancer be completed.

7. Conclusion and Floating IP

OpenStack Octavia is now creating all the components – the load balancer, listener, pool, members and, optionally, the health monitor. This process may take a few minutes.

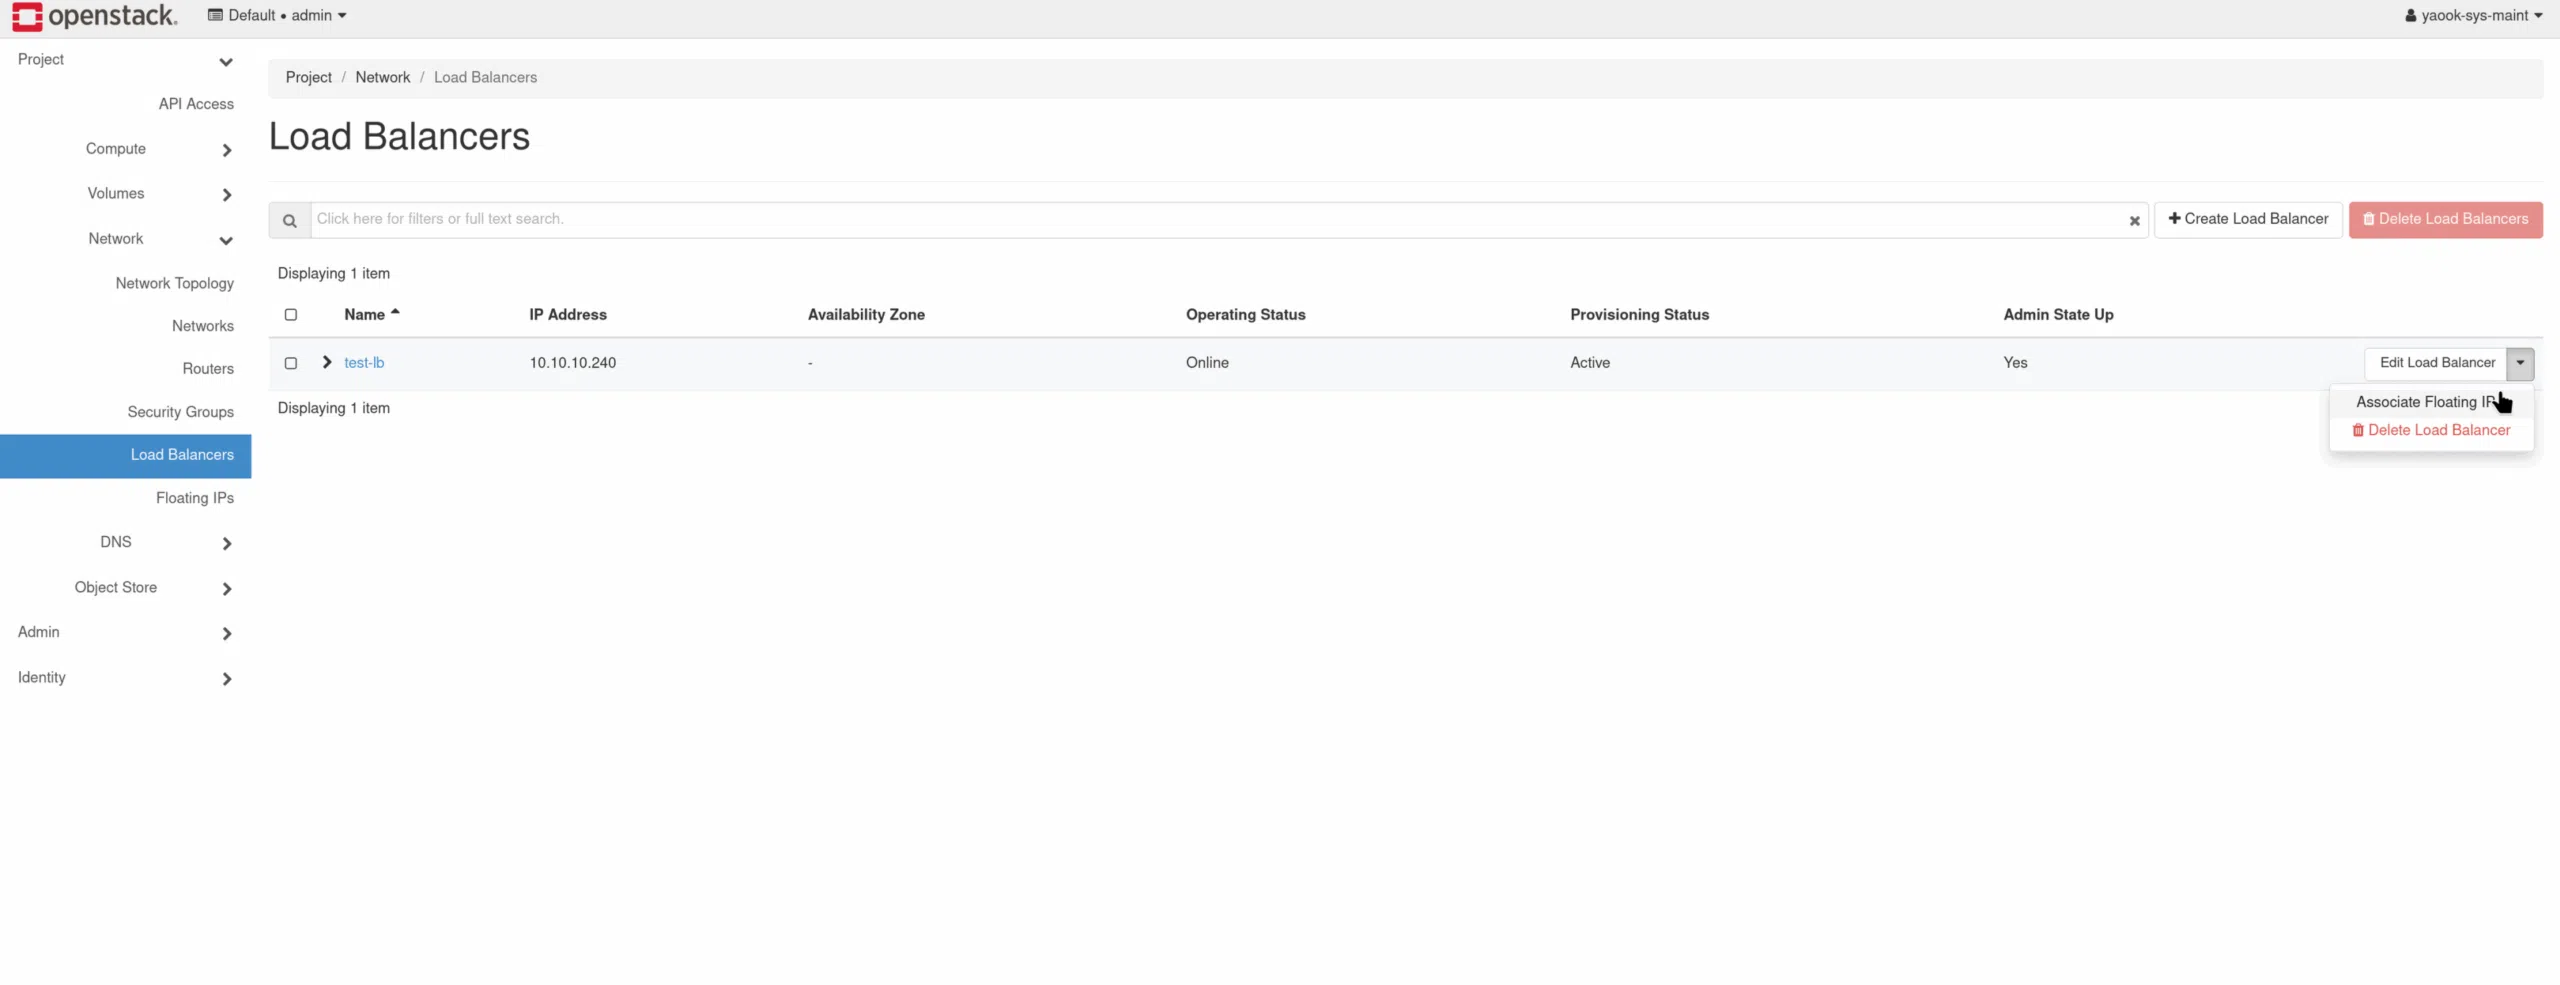
Once the load balancer is active, you can check its status on the dashboard.
To ensure that the load balancer also accessible from the outside is, it must finally be given a Floating IP be allocated.

You can find further tutorials on working with OpenStack cloud environments here.

Matching products

Find the right solution for this issue.

Contact

Are you not yet using our OpenStack cloud and interested in our IaaS? Please feel free to get in touch.

Benjamin Schreier Head of Sales

Benjamin Schreier

Sales
max böttcher Sales Engineer Software Solutions

Max Böttcher

Sales

Contact us.

More blog posts

Getting Started in the Cloud | Chapter 2: Accessing the OpenStack API | Header
In this post, advanced users will gain an overview of the CLI tools and API endpoints available in the cloud environment, enabling them to automate recurring tasks and manage infrastructure using scripting or IaC tools such as Terraform or OpenTofu.
Getting started with the OpenStack cloud: Accessing the Horizon dashboard
In this blog post, we’ll introduce you to the OpenStack Horizon dashboard and explain some of the key terms you’ll come across in this context.