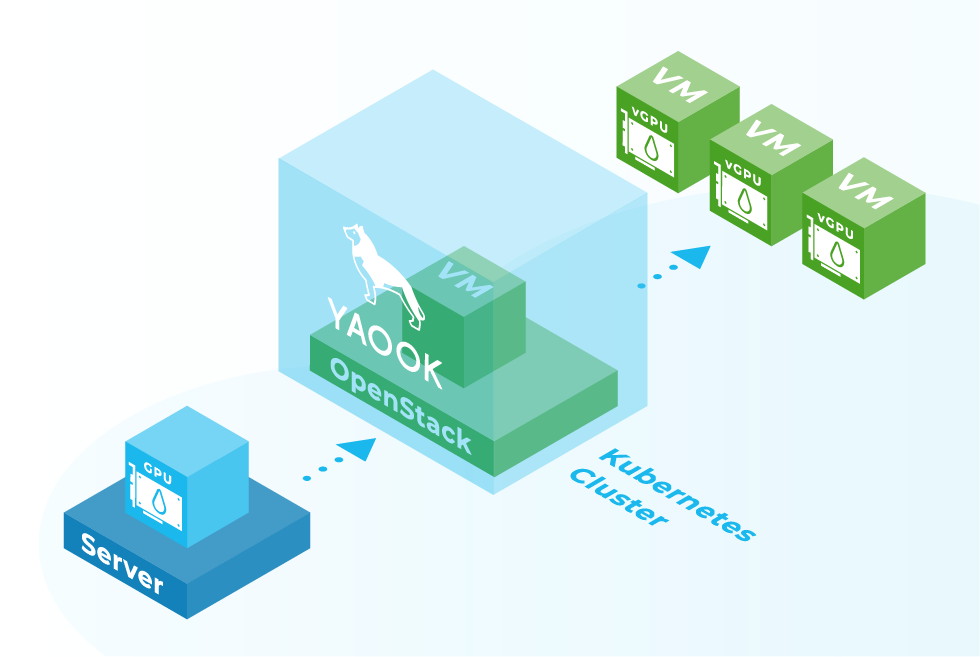
Graphical processing units (GPUs) have become indispensable in the age of machine learning. Since the computing power of GPUs increases with each generation, it is important to utilize them to the maximum. One possibility is to make them available to several end users in a virtualized form. In this case, one NVIDIA GPU can be passed on to several VMs in a time-slicing process. To avoid this process having to be carried out manually, the whole process can be automated using Yaook.
What is needed to virtualize a GPU?
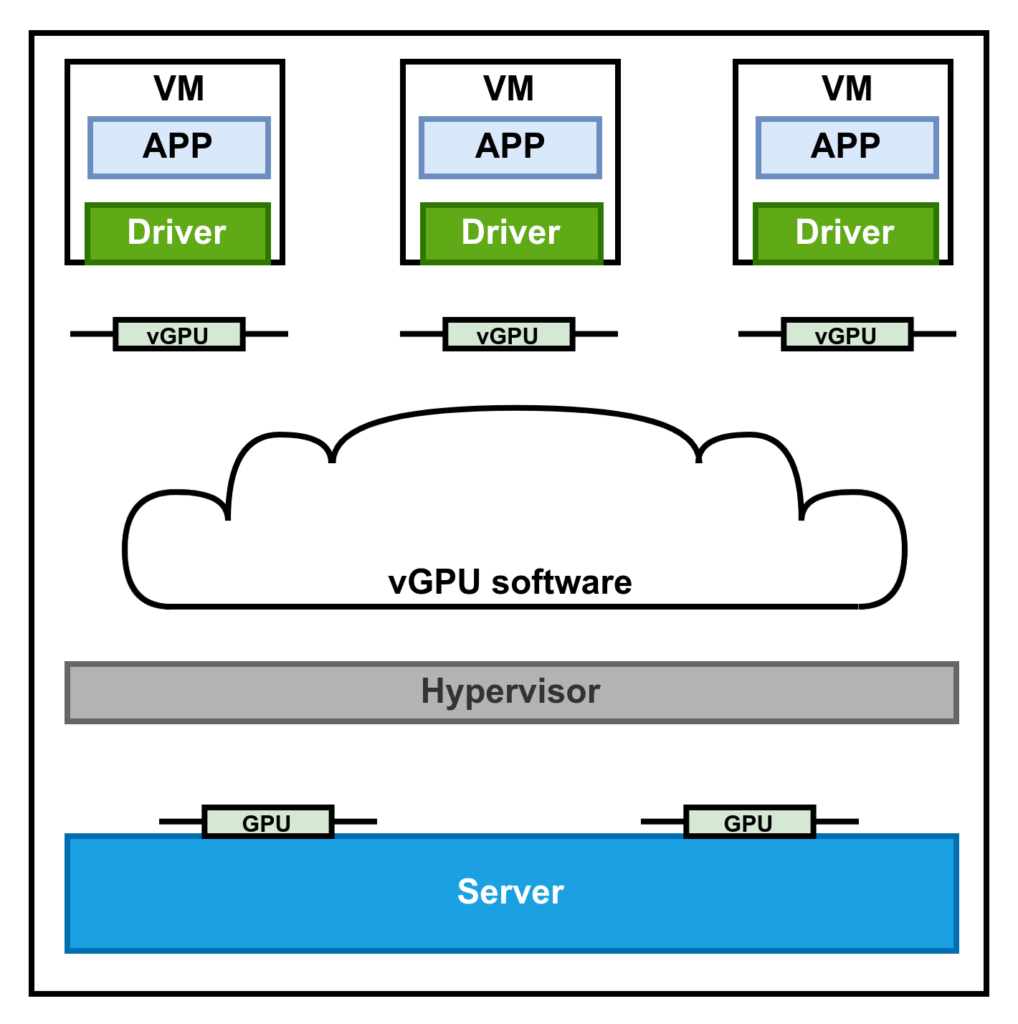
A physical GPU is installed in the server. An important note is that not every NVIDIA GPU can be virtualised. However, this only applies to older graphics cards. This does not apply to the current Ampere architecture, as it can be fully virtualized. The figure is intended to illustrate the software stack. The KVM hypervisor is installed on the hardware. The vGPU software consists of a vGPU manager and a vGPU driver. The manager takes care of scheduling the vGPUs for the physical GPU, the driver ensures that the VM can use the vGPU.
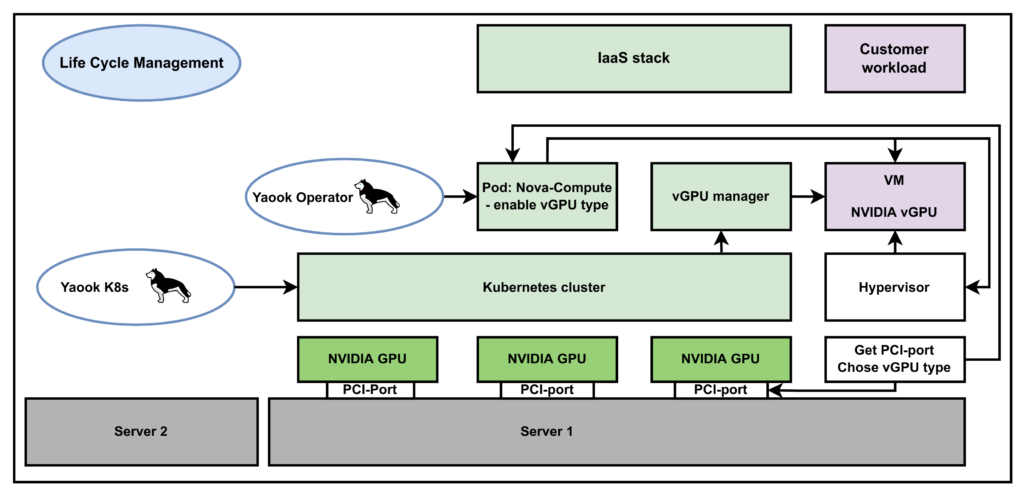
The following figure shows an overview over the vGPU Support in Yaook:
First, the Kubernetes cluster is rolled out. This can be started remotely from a second server. Subsequently, the operator is set up. This must run on the server on which the physical GPU is installed, as does the Kubernetes cluster. The operator then starts and manages the individual pods. The Nova Copute pod then launches the VM on which the virtualized GPU is running. The desired vGPU configuration must be added to the Nova Compute Pod.
If you want to virtualize a GPU with Yaook, you can perform the following steps.
Before getting started, make sure that the following prerequisites are met:
- INTEL/AMD CPU
- NVIDIA GPU which supports vGPUs
Before installing Yaook Kubernetes, please set the vGPU support flag to true as well as the vGPU variables in the config.toml. A config.template.config: https://gitlab.com/yaook/k8s/-/tree/devel/templates
# vGPU support
virtualize_gpu = true

...

# vGPU support
[nvidia.vgpu]
driver_blob_url = #vGPU driver path
manager_filename = #vGPU Manager file name
Physical GPUs supporting virtual GPUs propose mediate device types (mdev). To see the required properties, go to the following folder. Note: You still need to get the right PCI port, in which the GPU is plugged in. Please check in the official NVIDIA documentation.
$ lspci | grep NVIDIA
82:00.0 3D controller: NVIDIA Corporation TU104GL [Tesla T4]
$ ls /sys/class/mdev_bus/0000:82:00.0/mdev_supported_types
The most important variable to set is the enable_vgpu_types in the nova.yaml. The file is located under /docs/examples/nova.yaml. Here, you decide the given vGPU configuration considering the acquired licence. Unfortunately, not all vGPU configurations can be entered into a list in nova.yamlNova only allows a single vGPU type since the queens release. You can find a complete list of the vGPU configuration in the official Documentation of Yaook.
compute:
configTemplates:
- nodeSelectors:
- matchLabels: {}
novaComputeConfig:
DEFAULT:
debug: True
devices:
enabled_vgpu_types:
- nvidia-233
The last step is to configure a flavor to request one virtual GPU. It is worth mentioning that since the Queens release, all hypervisors only allow a single virtual GPU per instance.
$ openstack flavor set --property "resources:VGPU=1"
Now you should be able to spawn virtual machines with a vGPU.
