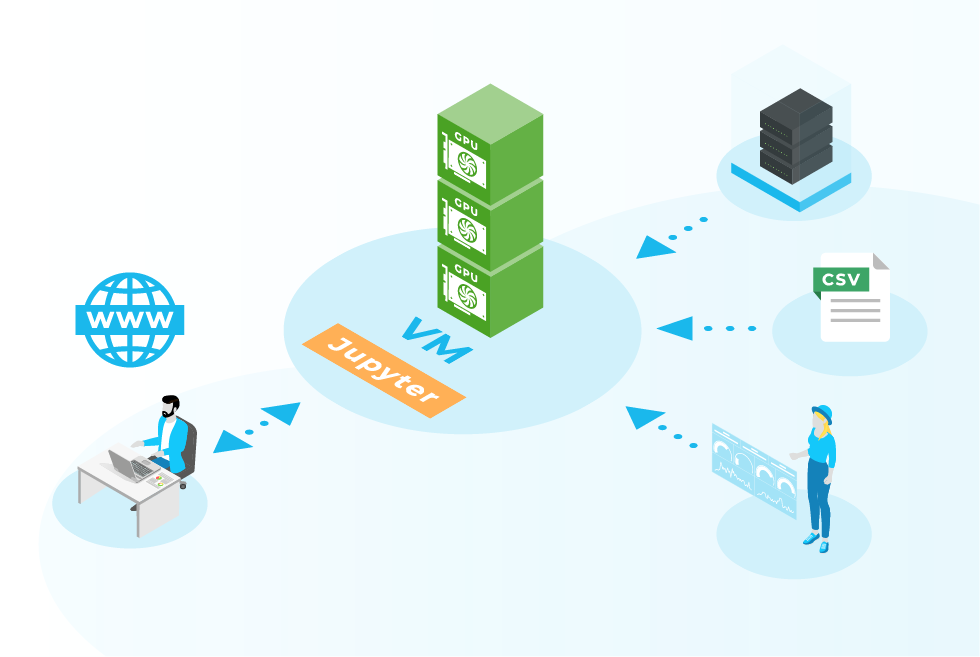
With the growing amount and complexity of data in business processes, the importance of getting an understanding of the data increases. In the blog post „Data Analysis Away from Excel – Getting Started“, the key points of data analysis with Python and Panda have already been presented. This article aims to go a step further and explores a setup for data science applications using Jupyter Notebook running on a remote server.
Jupyter Notebook is a product of project Jupyter, that “exists to develop open-source software, open-standards, and services for interactive computing across dozens of programming languages.” [1]
Why jupyter notebook with remote servers?
The multilingual, interactive computing environment Jupyter Notebook promises to be a perfect playground for data science and AI applications. Its comprehensive functionality allows users to combine code, annotations, multimedia, and visualizations into one interactive document.
Since Jupyter Notebook runs through a web browser, the Notebook itself can be easily hosted on a remote server, which is a strong plus for use cases with special computational needs, such as more CPU cores, RAM or GPUs. Typical examples are complex data processing, big data management or learning of extensive AI models like neural networks.
Therefore, it is worth taking a critical look at the possibilities and limitations and understanding how to set up Jupyter Notebook with OpenStack.
What opportunities does jupyter notebook provide?
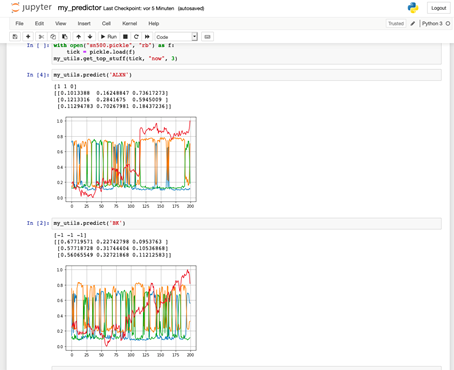
- Showcasing & Prototyping: The cell-based approach makes it easy to follow what the code is doing step by step. You can see both the code and the results. The code can be edited and re-run incrementally in real time, with feedback displayed directly in the browser. This facilitates exploring new concepts, prototyping, and testing small snippets of code.
- Sharing & Documenting: The ability to interact with the code makes Jupyter Notebook a perfect tool for code sharing. The user can not only view the code, but also execute it and view the results directly in the web browser. The meaning of the code can be explained line by line and the direct feedback is demonstrated.
- Visualization tools: With the functionality to generate images and graphics inline from the code, you can play around interactively and easily gain a better understanding of the data this way.
- Powerful Data Management: Jupyter’s features make it particularly suitable for data management. It allows data preparation, exploration, and visualization even for large amounts of data in a good way through the easy remote hosting. The parallel access and editing of data are further advantages.
- Useful further functionalities: Jupyter Notebook provides many other nice features – for example, you can convert code to PDF, rst, markdown or HTML. Moreover, Jupyter Notebook supports other languages besides Python, such as R or Julia.
What limitations does it have?
- Risk of duplicatecode: The cell–based approach is more likely to generate duplicate code, in comparison to the general programming approach with functions/classes/objects. This complicates maintaining one version of the truth and makes collaboration difficult
- Session state not saved: The state of any code running cannot be preserved and restored between sessions. That is why every time you load the Jupyter Notebook, you will need to re–run the code to restore its state.
- Some IDE features are missing: As Jupyter Notebook is not a full–blown development environment for Python, some useful features are not available, such as interactive debugging, code completion, and module management.
For which use case do we recommend jupyter notebook?
➔ For exploration and playing around with data, Jupyter Notebook is a great tool with broad functionalities. The ability to run it on remote servers makes it an easy way to go when you have special compute requirements and only need some light scripting.
➔ For problems that require complex code development for production, Jupyter Notebook may not be the right tool because of the difficulty in enabling good code versioning, structuring code reasonably, packaging code into functions, and developing tests for them. For this reason, also be cautious about using Jupyter Notebook when collaborating in cross-functional or larger teams.
How to set up jupyter notebook in the Cloud&Heat OpenStack.
This part of the blog post shows a minimal example on how to setup a Jupyter Notebook server on our infrastructure and how to reach it from the outside.
- Start an openstack-instance with Ubuntu-Image 18.04 LTS or 20.04 LTS on Cloud&Heat infrastructure. Find more information on how to setup a network in openstack and how to use security groups here: https://www.cloudandheat.com/create-a-network-in-openstack/
- Define security group “jupyter” inside Openstack for ingress traffic on TCP port 8888
- assign ssh and jupyter security group to the spawned instance
- associate floating ip to server and connect with your private key file via
ssh ubuntu@<floating-ip>

$ sudo apt update

$ sudo apt install -y python3-pip

$ pip3 install --upgrade pip

(recommended, but optional) setup an environment via venv/conda

$ pip3 install notebook

$ python3 -m notebook --generate-config
Open the file ~/.jupyter/jupyter_notebook_config.py in your favorite text editor, change the following parameters, remove the line comments in the edited lines and save the configuration:
#c.NotebookApp.ip = 'localhost' –> change to c.NotebookApp.ip = '*'

#c.NotebookApp.open_browser = True –> change to c.NotebookApp.open_browser = False
cd to dir where notebook should be executed (i.e. ~/user.directory/notebook-test)
$ python3 -m notebook
This command runs the notebook server in the current directory and creates a token for authentication that is used in the request.
Access the Jupyter on remote machine via browser:
http://<floating-ip>:8888/?token=<jupyter-token>
Create a notebook and start creating markdown or code cells
Please note that the Notebook just uses the generated token for authentication. The traffic to the Notebook is NOT encrypted, therefore additional security mechanisms should be implemented. For example, you can setup and access the Virtual Machine and the notebook through a Wireguard VPN. Get in contact with us to get further information on how to securely operate your infrastructure: info@cloudandheat.com
Outlook
This article described the pros and cons of running code inside a Jupyter Notebook. Additionally, we described on how to setup a rudimentary Notebook server via the Cloud&Heat infrastructure.
As mentioned before, the Jupyter Notebook is useful in a range of applications. Hosting on a remote server allows different groups of users to use different features of the platform. Some companies are building entire business models around it, like https://www.kaggle.com/ or Google Colaboratory (https://colab.research.google.com). IBM even allows access to their quantum computer via Jupyter Notebooks (IBM Quantum Lab).
For provisioning a data science playground with appropriate dependencies, project Jupyter also provides a list of pre-configured docker images for different use cases. Find more information at https://jupyter-docker-stacks.readthedocs.io/en/latest/using/selecting.html
The docker-images can also be deployed on the Cloud&Heat managed kubernetes service to use features like monitoring, ssl-encryption, load balancing and more. For more insights feel free to contact us: info@cloudandheat.com
Sources
- [1] https://jupyter.org/
- https://jupyter-docker-stacks.readthedocs.io/en/latest/using/selecting.html
- https://www.infoworld.com/article/3347406/what-is-jupyter-notebook-data-analysis-made-easier.html
- https://hub.packtpub.com/10-reasons-data-scientists-love-jupyter-notebooks/
- https://betterprogramming.pub/pros-and-cons-for-jupyter-notebooks-as-your-editor-for-data-science-work-tip-pycharm-is-probably-40e88f7827cb
- https://towardsdatascience.com/5-reasons-why-jupyter-notebooks-suck-4dc201e27086
- https://www.kaggle.com/
- https://colab.research.google.com


