Instances must now be attached to private networks. Private networks allow your instances to communicate with each other in the same network while isolating them against the internet as well as networks and instances of other users. Each private network belongs to a single project, while a project can have several private networks.
To be able to access the internet you need to configure an OpenStack router that connects the private network with the public network of the cloud provider. For communicating with an instance from the outside will additionally require a floating IP assigned to it. You can configure your frontend server (e.g. a Web App) which is accessible from the internet as a jump host for other VMs e.g. dedicated database servers which don’t need to be direct accessible.
See here on how to create a private network and attach it to the public network via a router. Some of the following steps are specific to the used Linux distribution.
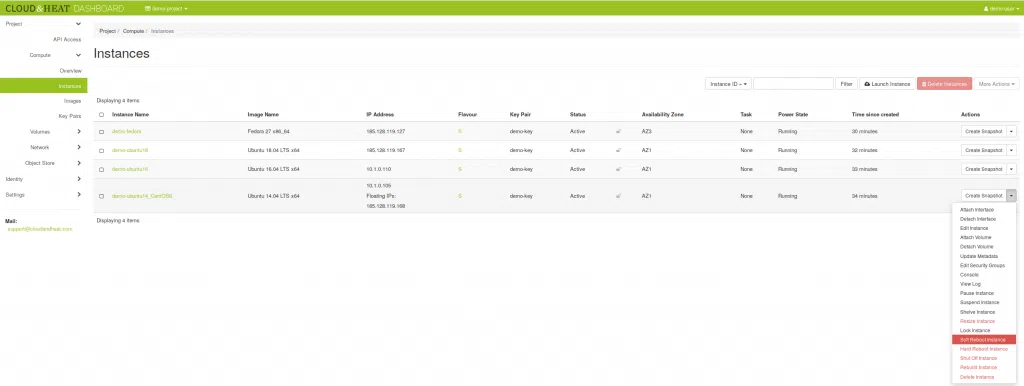
Attaching a new interface
Ubuntu 14.04 and CentOS 6
Detach the old interface from the instance, connected to the sharedPublicIPv4 network, identified by a public IP.


Attach a new interface connected to the private network (demo-network in this example).


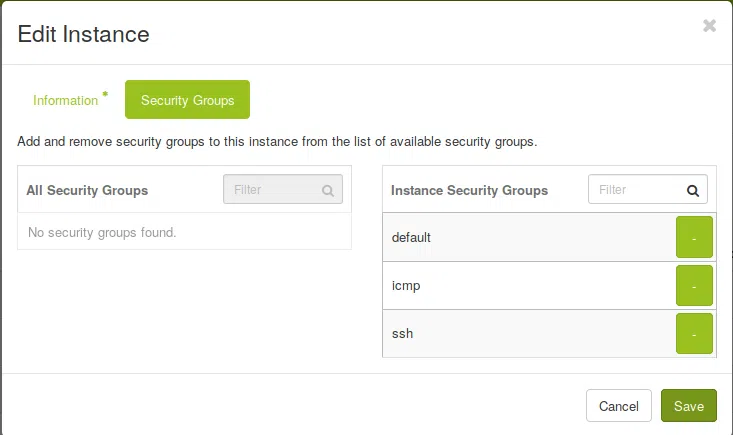
You will need to update the security groups, as they are bound to the port, which will change with the new interface.

After a reboot of the instance, it should be reachable from within the private network (ssh ubuntu@10.1.0.105<(/code>).
Read the last section on how to make your instance accessible from the internet.
Ubuntu 16.04
Like in Ubuntu 14.04 you need to detach the old interface from the instance and attach a new interface connected to the private network. Update the security groups and reboot the instance, it should now be reachable from inside of your private network. Again, read the last section on how to connect your instance to the internet.
In Ubuntu 16.04 you can assign persistent network interface names using the file /etc/udev/rules.d/70-persistent-net.rules. We recommend logging into your instance to update this file with the new interface. To log in directly, you need to assign a floating IP (again, see create floating IP). Alternatively, you can ssh from one of the other instances (we recommend using ssh-agent for this, forward your keys with ssh -A) or use the dashboard console. The udev rule identifies the interface by its MAC address which you need to find out first.
$ ssh ubuntu@10.1.0.110
$ ip a
...
2: ens3: <BROADCAST,MULTICAST,UP,LOWER_UP> mtu 1450 qdisc pfifo_fast state UP group default qlen 1000
link/ether fa:16:3e:89:68:80 brd ff:ff:ff:ff:ff:ff
...
$ sudo vi /etc/udev/rules.d/70-persistent-net.rules
SUBSYSTEM=="net", ACTION=="add", DRIVERS=="?*",
ATTR{address}=="fa:16:3e:89:68:80", NAME="ens3"
Update the rule with your the MAC of your new interface.
Ubuntu 18.04
On Ubuntu 18.04 the process is somewhat different. Attach the new interface without detaching the old one, then log into the instance using the public IP of the old interface. Find out the MAC address of the new interface (`ens6` in this example) and add the interface information to the file /etc/netplan/50-cloud-init.yaml.
$ ssh ubuntu@185.128.119.167
$ ip a
...
3: ens6: <BROADCAST,MULTICAST> mtu 1500 qdisc noop state DOWN group default qlen 1000
link/ether fa:16:3e:eb:b2:a6 brd ff:ff:ff:ff:ff:ff
$ sudo vi /etc/netplan/50-cloud-init.yaml
network:
version: 2
ethernets:
ens3:
dhcp4:
truematch:
macaddress: fa:16:3e:47:77:56
set-name: ens3
ens6:
dhcp4:
truematch:
macaddress: fa:16:3e:eb:b2:a6
set-name: ens6
Instead of rebooting your instance, you can run netplan generate; netplan apply. Now you can detach the old interface and update the security groups. If you didn’t run the netplan commands, you can reboot your instance now to apply the changes. The instance is now reachable from the private network, add a floating IP to make it accessible from the internet (see last section) and add an router to connect the private network with the internet, if not allready done.
In contrast to the Ubuntu 16.04 method, it is not possible here to reuse the old interface name for the new interface, as the instance would then no longer be accessible. Any services listening on the old interface will have to be reconfigured to use the new interface name.
Fedora and CentOS 7
This method works for all Fedora versions as well CentOS7. First attach the new interface to the private network to your instance. Login via the public IP of the old interface and find the MAC address of the new interface.
$ ssh fedora@185.128.119.127
$ ip a
...
3: eth1: <BROADCAST,MULTICAST> mtu 1500 qdisc noop state DOWN group default qlen 1000
link/ether fa:16:3e:3b:e8:37 brd ff:ff:ff:ff:ff:ff
Here, the file /etc/sysconfig/network-scripts/ifcfg-eth0 has to be updated with the MAC address of the new interface.
$ sudo vi /etc/sysconfig/network-scripts/ifcfg-eth0
BOOTPROTO=dhcp
DEVICE=eth0
HWADDR=fa:16:3e:3b:e8:37
ONBOOT=yes<
TYPE=Ethernet
USERCTL=no
The old interface can now be removed, the security groups can be updated and the instance can be rebooted. Once rebooted, the instance should be reachable from inside your private network. The last section will explain how to attach a floating ip to the instance to make it accessible from the internet and how to add a router to the private network.
Making the instance accessible – create a router and adding a floating ip
You need to connect the private network via a OpenStack router with the provider network, so your instances can reach the internet. Here is described how a router can be created.
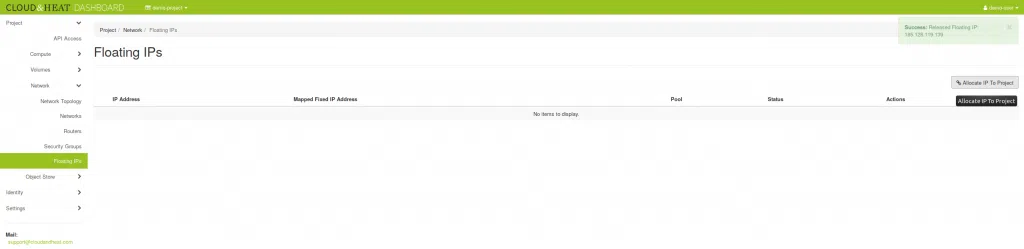
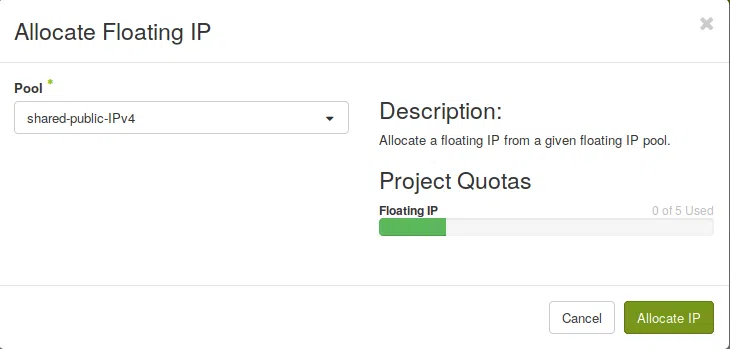
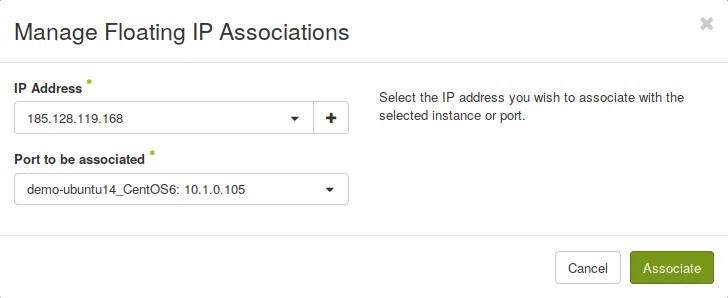
To make your instance accessible from the internet, attach a floating IP. This is not necessary if the instance needs be available only to other instances in the private network. The creation of a floating IP and attaching it to an instance is shown here: